Ash Wood and Epoxy Counter Top DIY
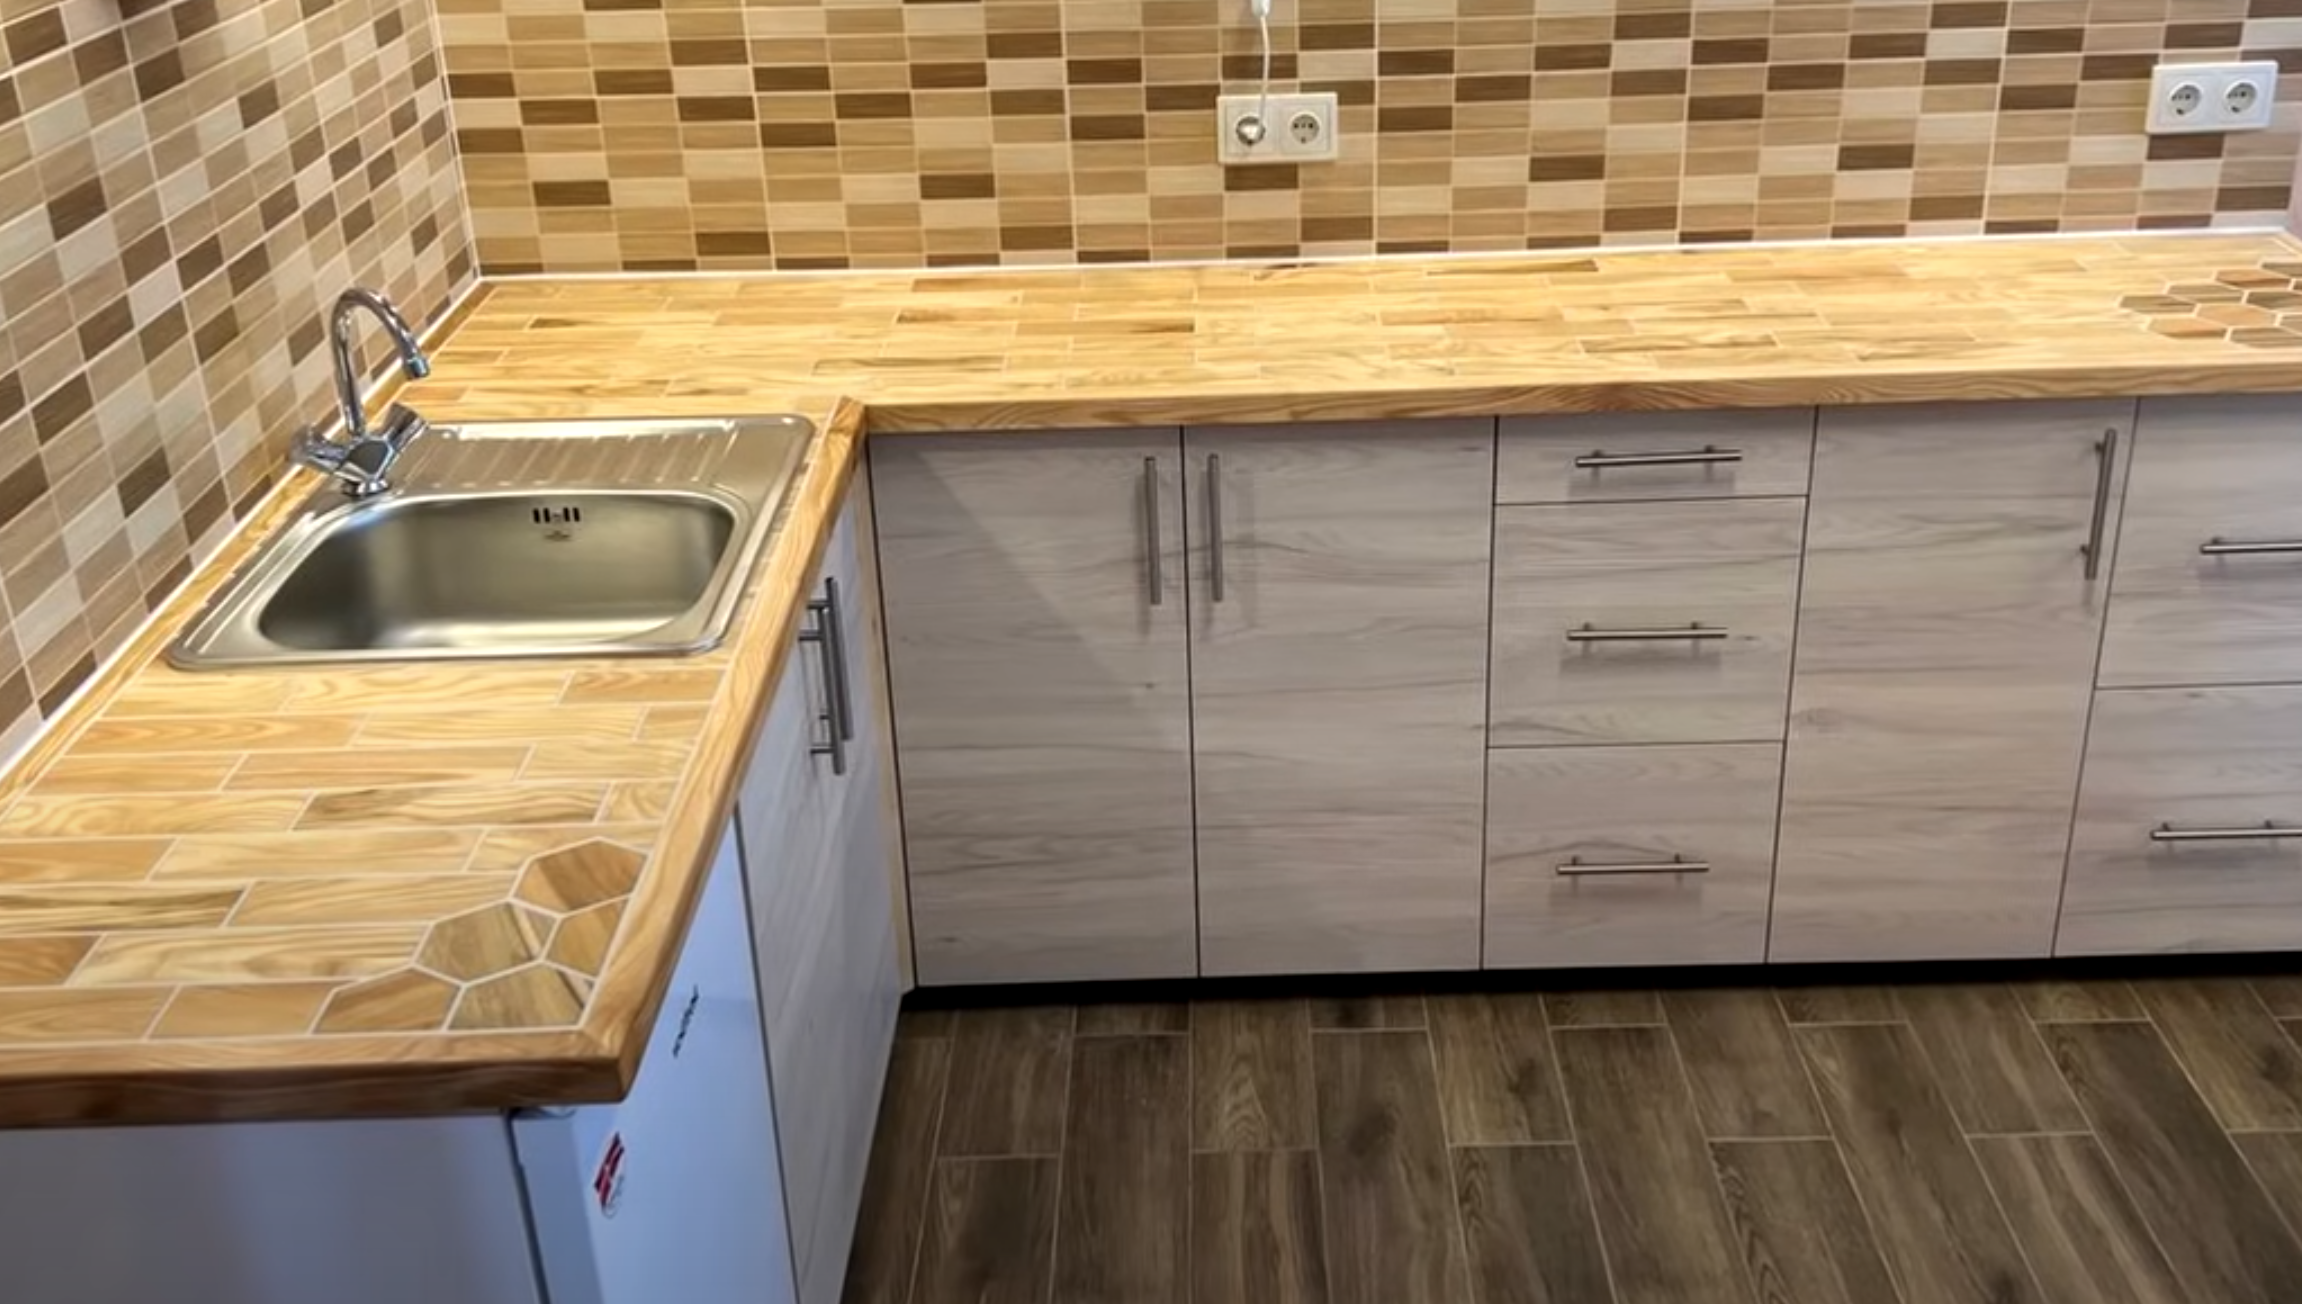
Creating a custom wood countertop is a rewarding and hands-on project that can add both beauty and functionality to any space. For this particular design, we’re working with rich ash wood, combining its natural light tones with the bold contrast of dark epoxy inlays. The result will be a striking, durable surface that’s not only visually appealing but also practical. This guide will take you through each step of the process, from cutting and assembling the ash strips into a unique hexagonal pattern, to filling gaps with epoxy and finishing the surface with a clear protective coat. Whether you’re a seasoned woodworker or a DIY enthusiast, this project will help you craft a one-of-a-kind countertop that’s sure to be the focal point of your kitchen or workspace.
Materials Needed:
- Ash wood planks (rectangle and hexagon-shaped)
- Wood glue
- Clamps
- Epoxy (preferably a dark color)
- Squeegee
- Sandpaper (various grits)
- Clear coat finish (e.g., polyurethane)
- Sink template or mold
Instructions:
1. Cutting the Ash Wood:
- Cut the Ash into Long Strips: Start by cutting the ash into long strips, ensuring that the pieces are uniform in width for a clean look.
- Cut the Hexagon Tiles: Using a saw or a miter saw, cut hexagonal pieces from the ash planks. These should be uniform and can be arranged in a repeating pattern for the surface.
- Cut Hexagonal Planks for the Edges: These should also be cut from the same ash wood to maintain a consistent aesthetic. The edges will form the outer perimeter of the base.
2. Assembling the Frame:
- Align the Pieces: Lay out your hexagonal pieces in a pattern, starting from the center or a corner, and place the edge planks around them to form the perimeter of the frame.
- Glue the Pieces: Apply wood glue along the edges where the pieces meet. Press the hexagonal tiles and edge planks together and ensure they are well-aligned.
- Clamp the Pieces: Use clamps to hold the pieces tightly in place while the glue dries. Ensure there is no movement to prevent gaps in the joints.
3. Filling with Epoxy:
- Prepare the Epoxy: Mix your dark-colored epoxy resin according to the manufacturer’s instructions. You can use a dark shade to match the wood tone.
- Fill the Gaps: Pour the epoxy into the gaps between the tiles, ensuring that it fills all cracks and crevices. Use a squeegee to smooth out the epoxy and make sure it is level with the wood surface.
- Clean Off Excess: Wipe off any excess epoxy using a clean cloth or a paper towel to avoid it spreading beyond the gaps.
- Let It Cure: Allow the epoxy to cure fully, following the recommended curing time on the epoxy packaging (usually 24 hours).
4. Creating the Sink Mold:
- Measure and Cut the Sink Area: Mark the space where the sink will be located. You may want to use a template or a sink mold to ensure precise measurements.
- Cut Away for the Sink: Using a saw, carefully cut out the marked area for the sink.
- Create a Mold Around the Sink Area: Build a temporary mold around the sink cutout to prevent the epoxy from spilling into the sink space. You can use scrap wood or silicone to form this barrier.
5. Smoothing and Sanding:
- Sand the Epoxy: Once the epoxy has fully cured, sand the entire surface with fine-grit sandpaper (around 220-grit) to smooth out any rough edges or drips.
- Bevel the Edges: Use a router or a sanding block to bevel the edges of the countertop to give it a polished look.
- Final Sanding: Finish sanding with a very fine grit to ensure a smooth surface.
6. Finishing Touches:
- Remove Dust: Use a tack cloth or a vacuum to remove all dust from the surface and edges to ensure a smooth and clean finish.
- Apply the Clear Coat Finish: Once the surface is clean, apply a clear coat of polyurethane or a similar wood finish to protect the wood and epoxy. Use a brush or cloth to apply a thin layer, ensuring an even coat. Allow the finish to dry and cure completely between coats.
- Final Inspection: After applying the clear coat, inspect the countertop for any imperfections or areas that need touch-ups. If necessary, sand lightly and apply a final coat.
7. Install the Sink:
- Fit the Sink into the Cut-Out: Once the countertop is fully finished, install the sink in the cut-out space. Ensure it’s sealed properly and securely.
Tips:
- Safety: Always wear safety glasses and a dust mask when cutting, sanding, and working with epoxy.
- Epoxy Color: If you prefer a dark epoxy over white, ensure you choose a color that complements the ash wood. A dark epoxy will contrast nicely with the light ash and highlight the unique grain patterns.
- Time Management: Allow each stage to cure fully before moving on to the next step for the best results.
By following these steps, you’ll create a beautiful and durable wood base countertop with a custom inlay design and a smooth epoxy finish.

