How to Make Gold Resin Earrings
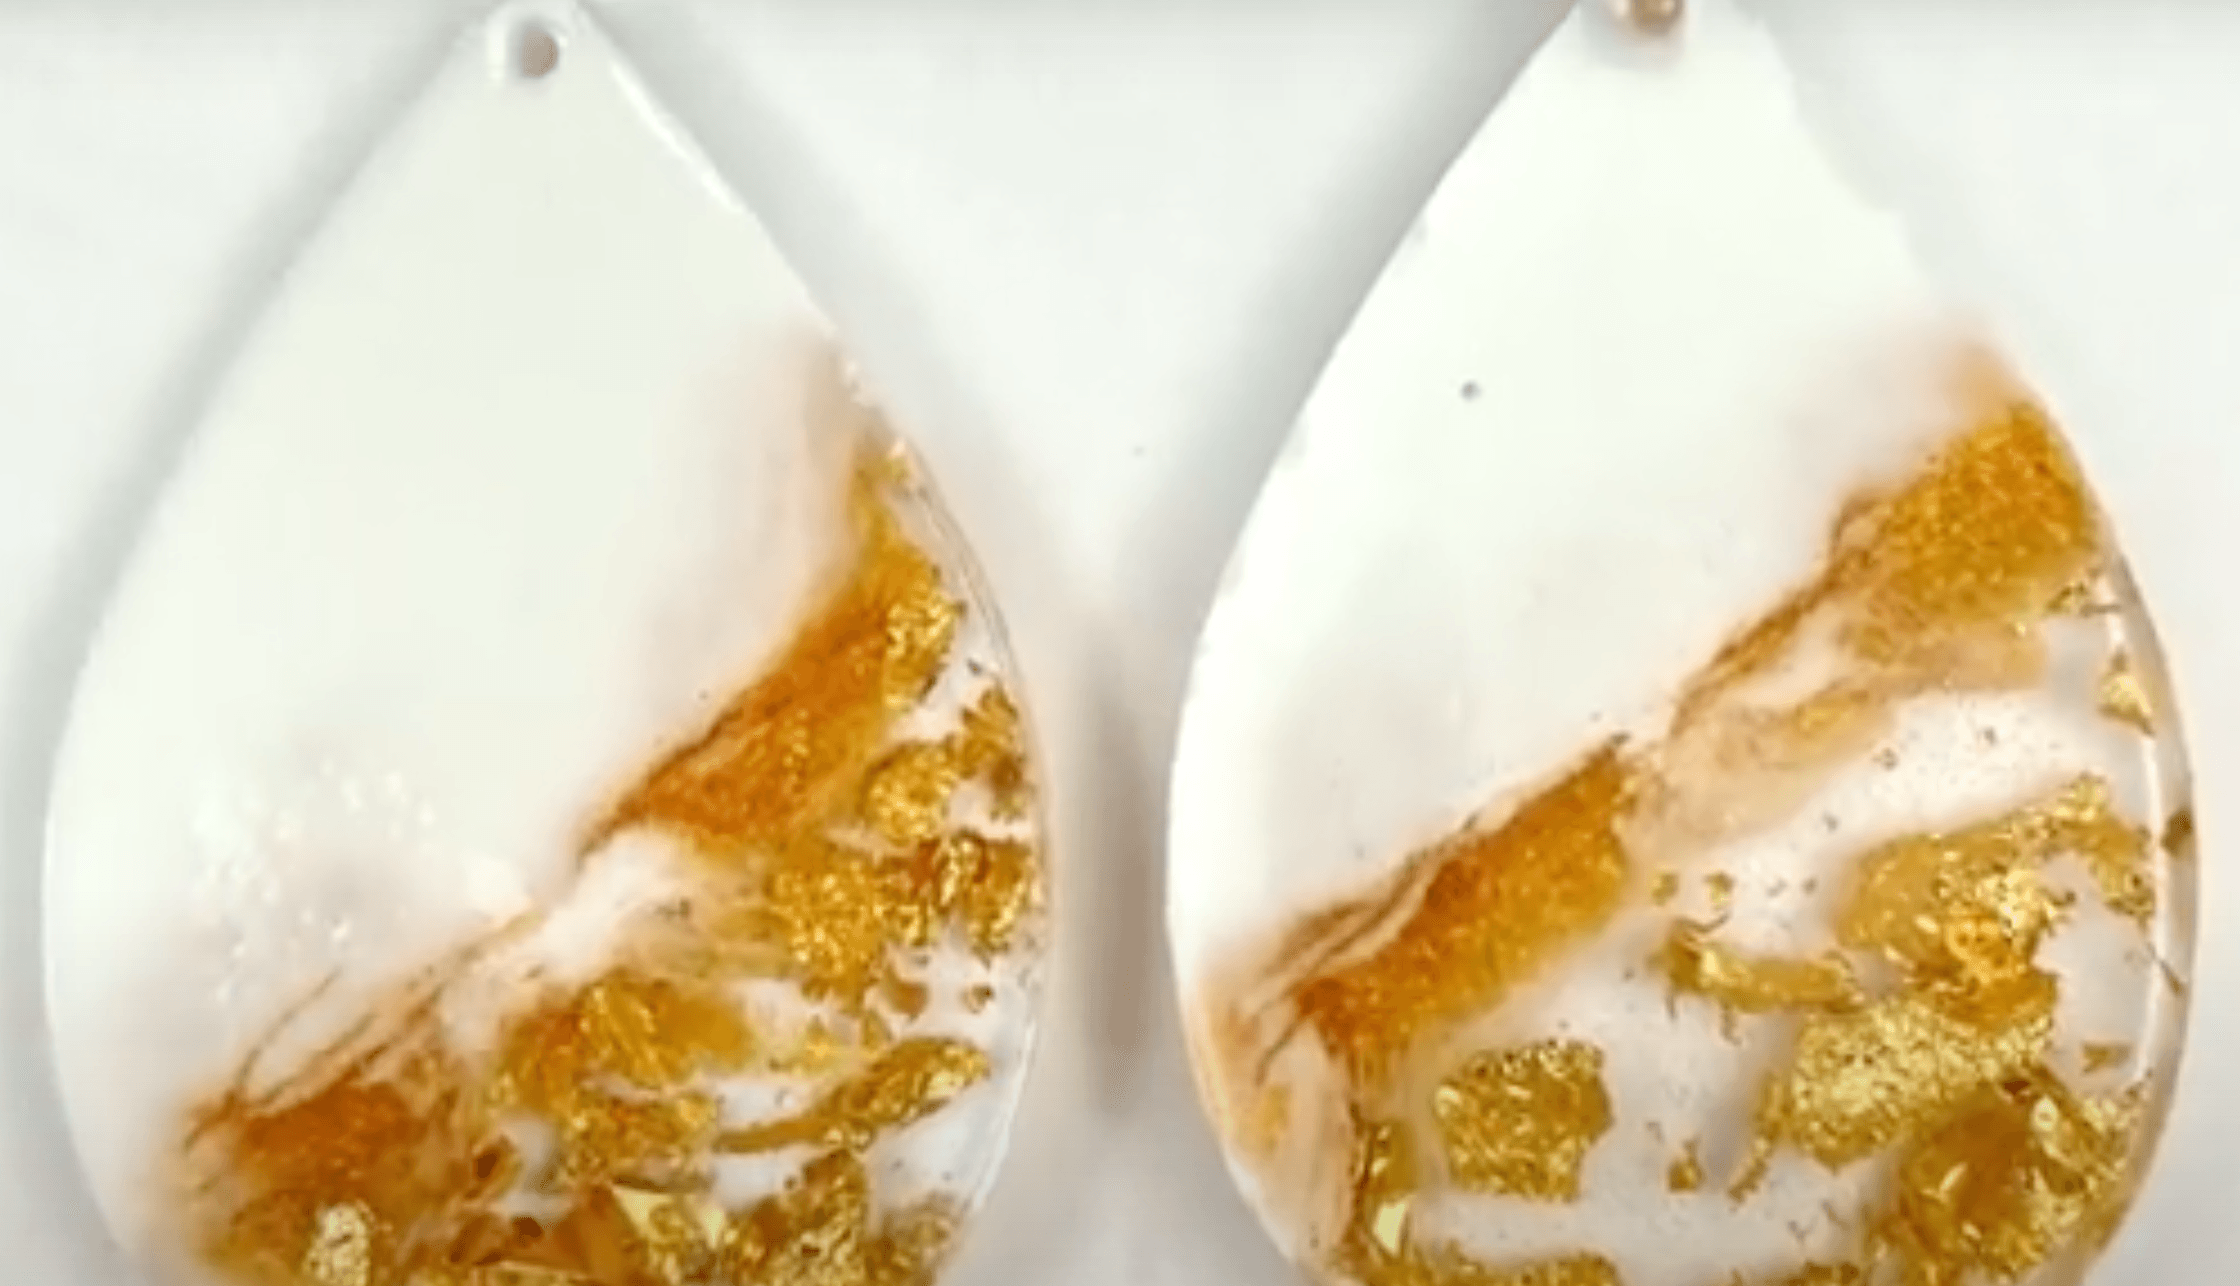
Creating beautiful gold resin earrings is a fun and rewarding DIY project. This guide will help you replicate the stunning design using a teardrop mold, epoxy resin, gold foil, and acrylic paint. Let’s dive in!
Materials Needed
- Teardrop Mold: Silicone mold for shaping the earrings
- Epoxy Resin: Jdiction Epoxy or similar (follow the manufacturer’s instructions)
- Gold Foil: For adding a luxurious touch
- White Acrylic Paint: To mix with the resin
- Mica Powder: Gold mica powder for added shimmer (same as in the video)
- Mixing Cups and Sticks: For preparing the resin
- Protective Gear: Gloves and a mask (to ensure safety while working with resin)
- Sandpaper: Various grits (100, 220, 400)
- Clear Coat: Optional (like a resin flood coat or acrylic spray)
Step 1: Prepare Your Workspace
- Find a Clean Area: Work in a well-ventilated, dust-free area. Lay down a protective cover (like a silicone mat) to catch any spills.
- Gather Materials: Have all your materials ready and within reach.
Step 2: Mix the White Resin
- Prepare the Resin: Following the instructions on your Jdiction Epoxy kit, mix the clear resin in a mixing cup.
- Add White Acrylic Paint: Add a few drops of white acrylic paint to the resin mixture. Stir until fully combined to achieve a smooth, opaque white color.
Step 3: Mix the Clear Resin with Gold Flakes
- Mix Clear Resin: In a separate cup, mix another batch of clear resin according to the instructions.
- Add Gold Flakes: Incorporate gold foil and mica powder into the clear resin. Stir well to distribute the gold evenly throughout the mixture.
Step 4: Pour the Resin into the Mold
- Pour the White Resin: Starting from one side of the teardrop mold, carefully pour the white resin mixture. Aim to fill about half of the mold.
- Pour the Gold Resin: From the opposite angle, pour the clear resin mixed with gold flakes into the mold. This technique creates a beautiful layered effect.
Step 5: Allow to Cure
- Cure the Resin: Let the resin cure according to the manufacturer’s instructions (usually 24-48 hours). Ensure it’s in a dust-free environment.
Step 6: Sand the Edges
- Demold the Earrings: Once fully cured, gently remove the earrings from the silicone mold.
- Sand the Edges: Use sandpaper to smooth any rough edges. Start with a coarser grit (100) to remove larger imperfections, then move to finer grits (220 and 400) for a polished finish.
Step 7: Apply a Clear Coat for Extra Shine
- Prepare for Coating: Clean the surface of the earrings to remove any dust or debris from sanding.
- Apply Clear Coat: You can either use a resin flood coat or an acrylic spray to give the earrings an additional shine. If using resin, mix according to the instructions and carefully pour over the earrings. If using spray, follow the manufacturer’s directions for application.
- Let It Cure: Allow the clear coat to dry completely, following the recommended curing time.
Step 8: Add Earring Findings
- Attach Earring Hooks: Once the earrings are fully dry and shiny, attach earring hooks or studs to your resin pieces.
Conclusion
Making gold resin earrings with a smooth, shiny finish is an enjoyable and creative project. With just a few materials and some patience, you can craft stunning earrings that are perfect for any occasion. Enjoy wearing your beautiful creations!

