Crafting a Sparkling LED Resin Picture Frame DIY
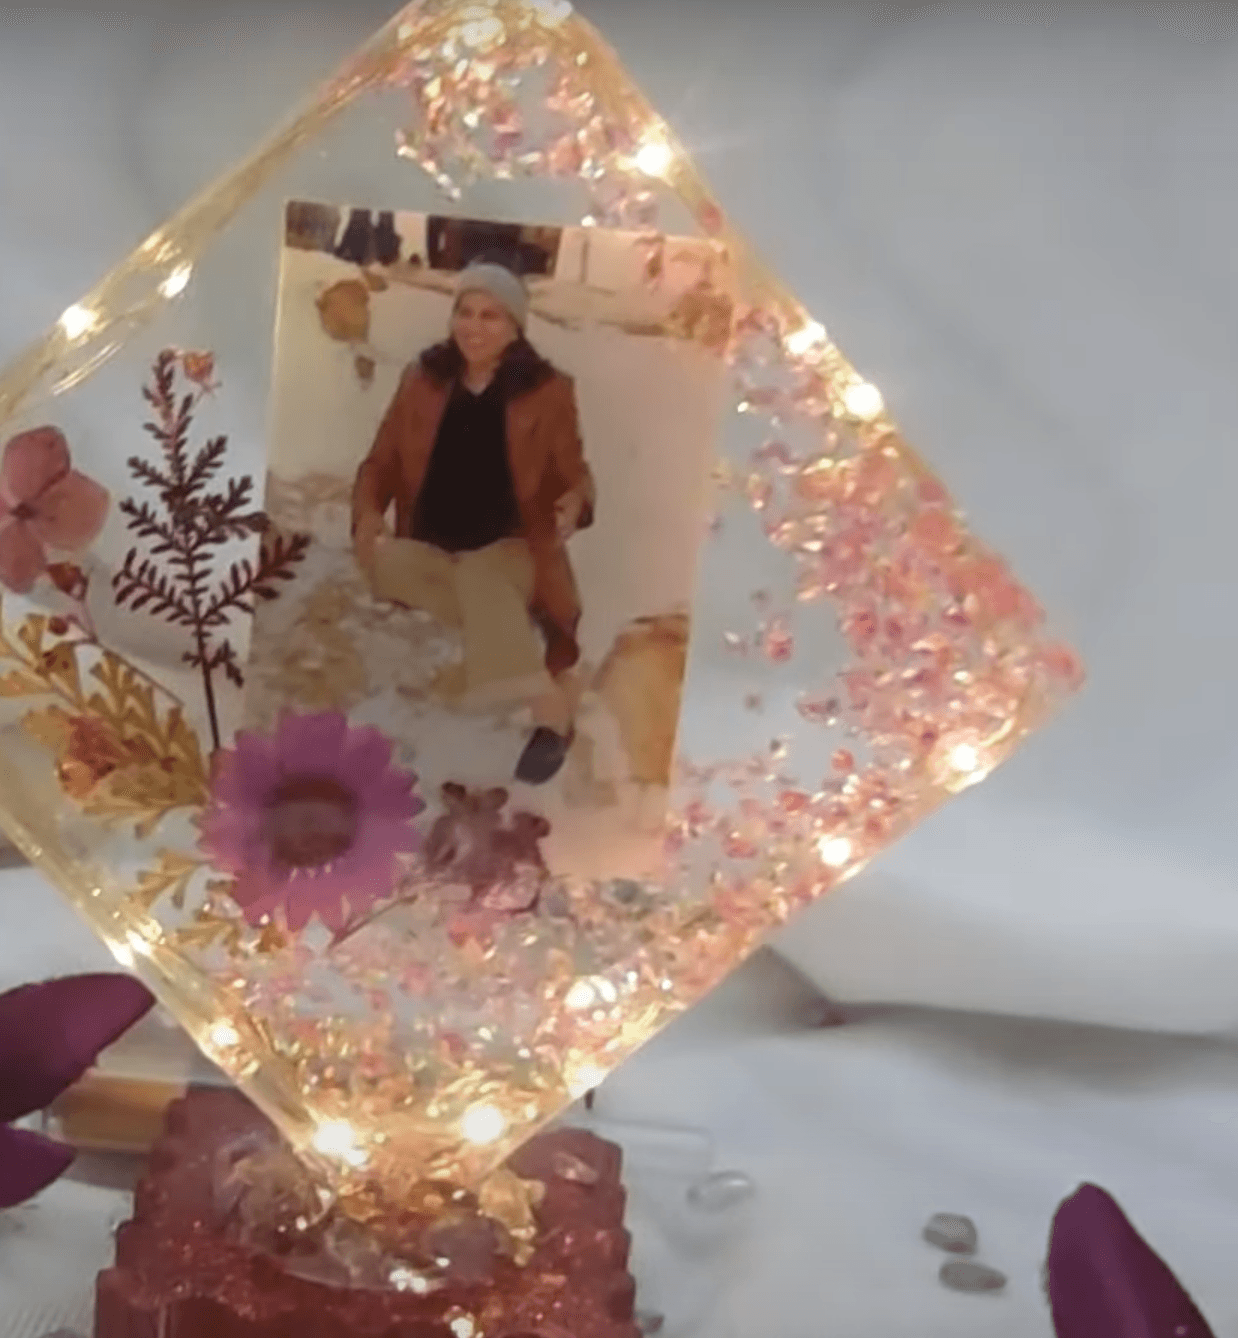
Prepare to embark on a creative journey and illuminate your world with a stunning LED resin picture frame. This isn’t just a DIY; it’s a chance to blend art and technology into a mesmerizing masterpiece. Let’s dive into the magical world of resin and create something truly special.
Gather Your Magical Ingredients:
- Clear Epoxy Resin: The lifeblood of your creation.
- UV Resin: A quick-acting magic potion.
- Twinkling LED String Lights: The heart of your frame’s brilliance.
- Crystal-Clear Epoxy Square Mold: The vessel for your masterpiece.
- Shimmering Pink Pyramid Chunks: A touch of elegance.
- Delicate Dried or Fake Flowers: A floral touch.
- Reliable Fevicol: A strong adhesive.
- Magical Bubble-Banishing Potion (Alcohol or Heat Gun): To ensure a flawless finish.
- A Mystical UV Lamp: The catalyst for your magical concoction.
Let’s Get Crafting:
- Prepare Your Workspace: Ensure your mold is clean and dust-free.
- Light Up Your Frame: Arrange the LED string lights around the outer edge of the mold.
- Secure the Lights: Use a small amount of UV resin to fix the lights in place, especially at the corners. Cure under a UV lamp.
- Pour the Resin: Carefully pour clear epoxy resin into the mold, avoiding air bubbles.
- Add the Lights: Gently place the LED lights into the resin, ensuring they remain in position.
- A Touch of Elegance: Add pink pyramid chunks to the bottom corner of the mold.
- Cure the Base: Let the resin cure for 24 hours.
- Add Your Photo: Use Fevicol to adhere the photo to the cured resin.
- A Floral Touch: Arrange dried or fake flowers around the photo.
- Seal the Deal: Pour a layer of epoxy resin over the photo and flowers. Use a heat gun or alcohol drops to remove any bubbles.
- The Finishing Touch: Once fully cured, you can either create an epoxy stand for your diamond-shaped frame or attach magnets to the back for a fridge magnet.
Tips for Success:
- Cleanliness is Key: A clean workspace and mold will ensure a smooth and bubble-free finish.
- Patience is a Virtue: Allow each layer of resin to cure completely before proceeding to the next.
- Get Creative: Experiment with different colors of LED lights, resin, and decorations to personalize your frame.
With a little patience and creativity, you can create a stunning LED resin picture frame that will illuminate any space.

