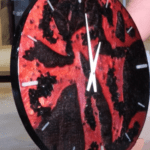
Epoxy Resin Wine Cork Clock Tutorial
Creating a decorative clock using a silicone mold, corks, and epoxy is a fun and creative DIY project! Here’s a step-by-step guide to help you through the process:
Materials Needed:
- Silicone mold – A round or square mold large enough to hold the clock face and corks.
- Wine corks – As many as needed, depending on the design and size of your clock.
- Clock mechanism kit – This typically includes the hands, numbers, and the mechanism itself.
- Epoxy resin – For creating the clock face and sealing in the corks.
- Silicone sleeve – This is for housing the clock mechanism.
- Craft knife – To trim corks if needed.
- Measuring cups – For mixing the epoxy resin.
- Stir sticks – For mixing the resin.
- Painter’s tape – To help position the numbers and keep things neat.
- Decorative clock numbers or markers – You can use adhesive clock numbers or paint your own.
- Optional: Glitter, pigment, or dyes – To add color or effects to the epoxy.
Instructions:
Step 1: Prepare the Mold
- Clean the mold: Make sure the silicone mold is clean and dry before starting.
- Insert the silicone sleeve: Place the silicone sleeve into the center of the mold where the clock mechanism will be housed. Ensure it’s centered properly and stays in place.
Step 2: Prepare the Epoxy
- Mix the epoxy resin: Follow the manufacturer’s instructions on mixing the epoxy. Usually, you’ll need to mix equal parts of resin and hardener. Stir it thoroughly for a couple of minutes to avoid any bubbles.
- Add any color or effects: If you want a colored or glittery clock face, mix in pigment or glitter now.
Step 3: First Pour of Epoxy
- Pour the first layer: Pour a thin layer of epoxy into the bottom of the mold. This will act as the base for your corks and will help them stay in place.
- Allow the epoxy to cure slightly: Let it cure until it’s slightly tacky but not fully hardened. This ensures the corks will sink in just enough to stay put without floating.
Step 4: Arrange the Corks
- Place corks in a pattern: Cut and arrange the wine corks in a decorative pattern in the mold. You can create a circle, spiral, or random design based on your preference. Press each cork gently into the semi-cured epoxy, ensuring they are stable and aligned.
- Tip: If you want a consistent circular pattern, measure the center of the mold and place corks in even intervals around the edge.
Step 5: Pour the Second Layer of Epoxy
- Fill the mold: Once the corks are in place and you’re happy with the arrangement, pour the remaining clear epoxy over the corks, filling the mold completely.
- Let it cure: Allow the epoxy to fully cure according to the manufacturer’s instructions. This may take anywhere from 24 to 72 hours, depending on the resin used.
Step 6: Remove the Mold and Sleeve
- Demold the clock: Once fully cured, carefully remove the clock from the silicone mold. Gently pull away the silicone mold and remove the silicone sleeve from the center.
- Check for any imperfections: If needed, use a craft knife to trim off any rough edges around the clock’s surface.
Step 7: Mark the Clock Numbers
- Position the numbers: If you’re using adhesive clock numbers, place them evenly around the clock’s edge (12, 3, 6, 9, etc.). You can also paint or use a stencil to add the numbers.
- Tip: Use painter’s tape to mark the placement of the numbers so they’re evenly spaced.
Step 8: Attach the Clock Mechanism
- Install the clock mechanism: Insert the clock mechanism into the silicone sleeve at the center. The mechanism should fit snugly into the hole in the sleeve, allowing the hands to rotate freely.
- If your mechanism has a long shaft, trim it to fit as necessary.
Step 9: Attach the Clock Hands
- Install the clock hands: Attach the hour, minute, and second hands to the mechanism, following the manufacturer’s instructions. Ensure they move freely and are not obstructed by the corks or resin.
Step 10: Test the Clock
- Check the mechanism: Once everything is installed, insert the battery into the clock mechanism and set the time. Ensure the clock works correctly and that the hands move smoothly.
Optional Final Touches:
- Add a decorative finish: If you like, you can paint the edges of the corks with gold, silver, or black paint to give them a more polished look.
- Add additional decorations: You could also glue small decorative elements like beads, shells, or stones to enhance the design.
Conclusion:
Once everything is set, you’ll have a beautiful, personalized wine cork clock that not only tells time but also serves as a functional and stylish piece of home décor. The combination of corks, epoxy, and the clock mechanism gives it a unique, rustic look with a modern twist.
Enjoy your gorgeous, handcrafted clock!

