Golden Leopard Print Small Table with Epoxy Resin DIY
Creating a stunning leopard print table using epoxy resin. Follow this tutorial guide to create your own small table featuring beautiful gold accents and a unique design.
Materials Needed
- Epoxy resin (two-part mix)
- Gold glitter
- Black and grey pigment
- Circular silicone mold (measuring for your table size)
- Stir sticks
- Heat gun or torch
- PVC tubing (for legs)
- Sandpaper
- Craft glue
- Mixing cups
Step 1: Prepare the Epoxy Mix with Gold Glitter
- Mix the Epoxy: In a mixing cup, measure and mix the epoxy resin according to the manufacturer’s instructions. Make sure to mix thoroughly to avoid any bubbles.
- Add Gold Glitter: Once your epoxy is mixed, gradually add gold glitter, stirring it in until you achieve your desired sparkle.
Step 2: Create the Leopard Print Design
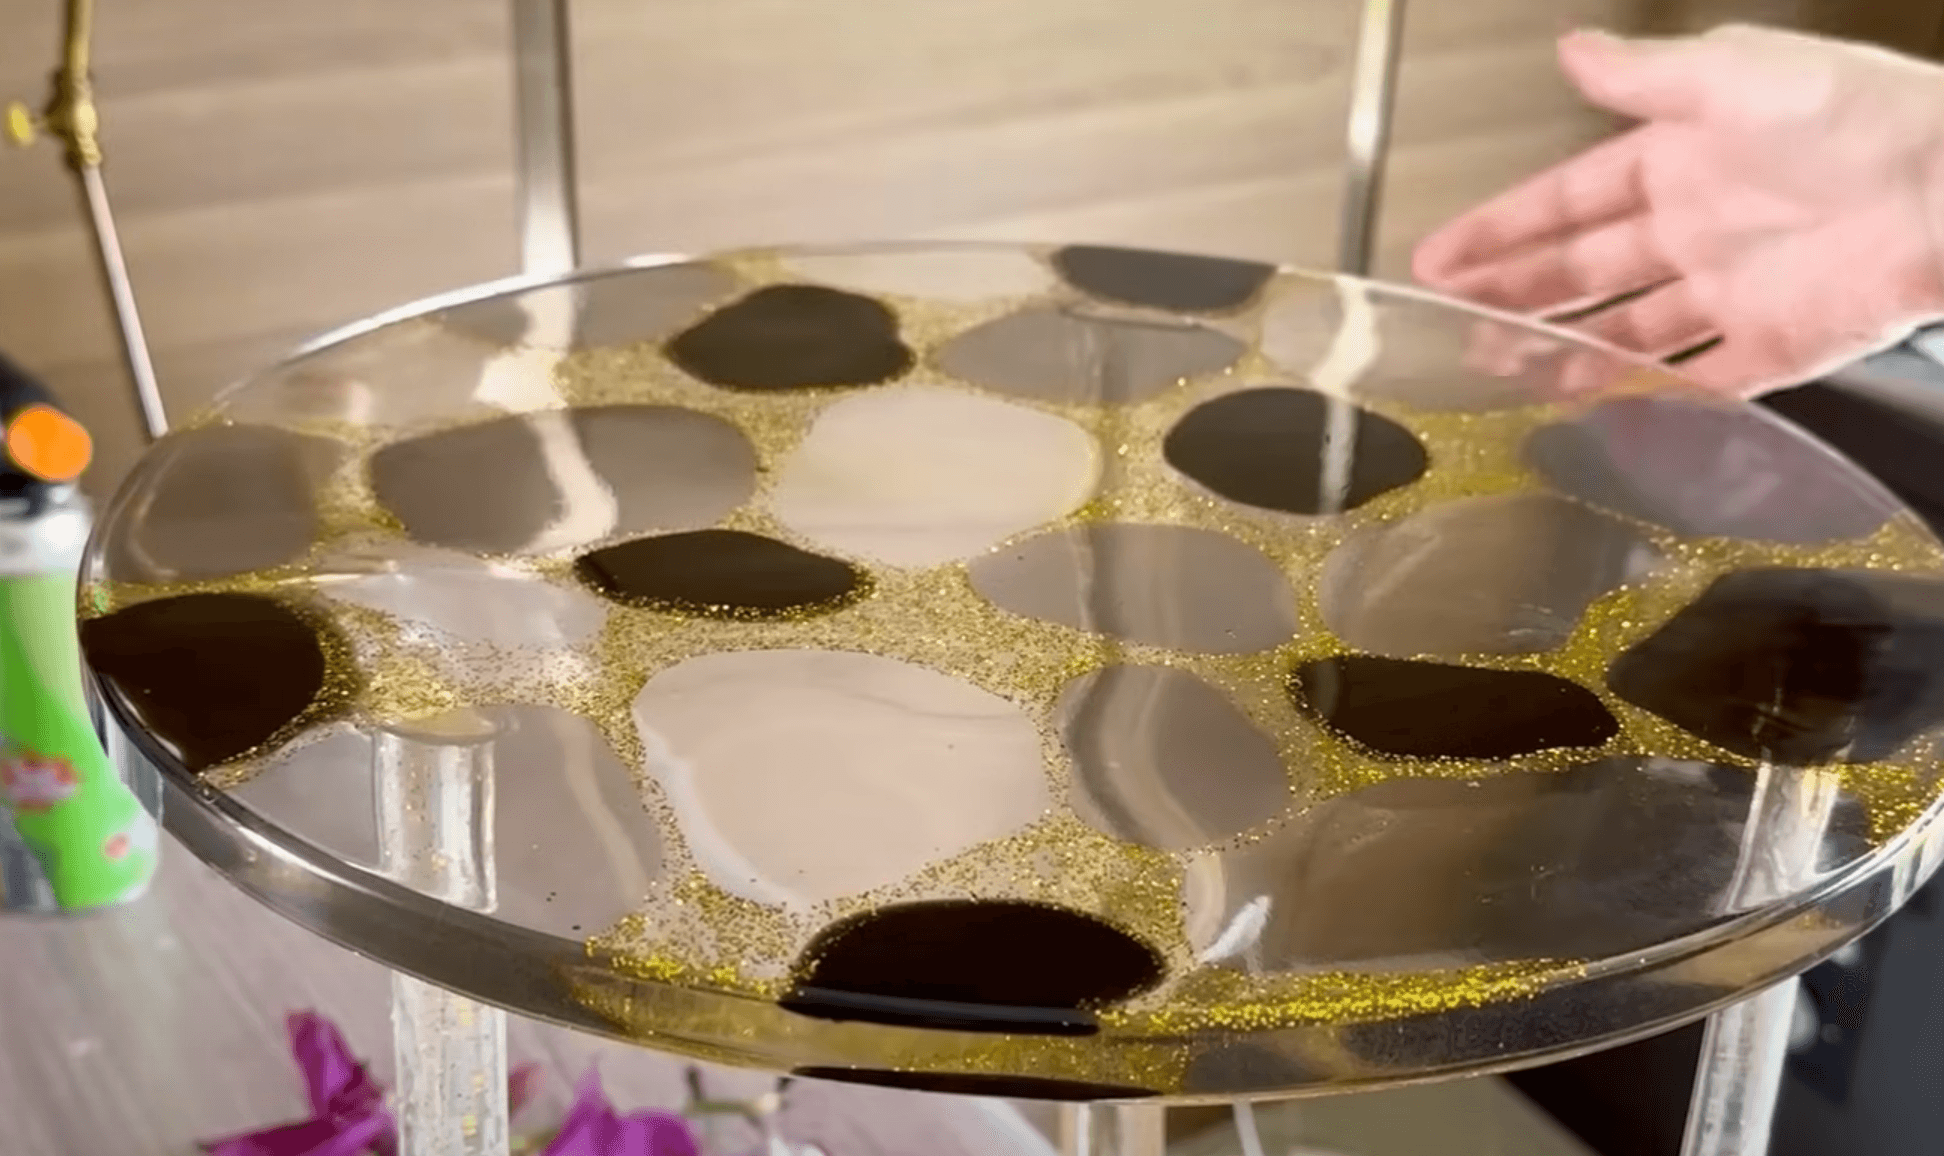
- Pour the Gold Epoxy: Carefully pour the gold glitter epoxy into the circular silicone mold. Use a stick to create patterns that mimic leopard print, allowing for organic, irregular shapes.
- Let It Dry: Allow the gold epoxy to cure for about 8 hours or until fully hardened.
Step 3: Fill in the Cells
- Prepare Black and Grey Epoxy: After the gold layer has cured, mix separate batches of epoxy with black and grey pigments.
- Fill the Cells: Using a stick or a knife, fill in the empty cells of the leopard print design with the black and grey epoxy. Leave some spaces open to maintain a balance between the three colors (gold, black, and grey).
- Cure Again: Let this layer cure for another 8 hours.
Step 4: Final Epoxy Pour
- Pour the Final Layer: Once the colored layers have cured, mix another batch of clear epoxy and pour it over the entire table surface to create a smooth finish.
- Remove Bubbles: Use a heat gun or torch to carefully remove any bubbles that rise to the surface. Move the heat source back and forth to avoid overheating any areas.
Step 5: Create the Legs
- Prepare PVC Tubing: Cut the PVC tubing in half to create two half-circle molds for the legs.
- Mix Glitter Epoxy: In a separate mixing cup, combine clear epoxy with more gold glitter.
- Pour into Molds: Fill the half-circle molds with the glittery epoxy mixture and let them cure for about 8 hours.
Step 6: Attach the Legs
- Glue the Legs: Once the legs have cured, carefully remove them from the molds. Use craft glue to attach them securely to the bottom of the table.
- Seal the Legs: Pour another thin layer of clear epoxy over the legs to seal them in place and coat them. Use your fingertips to spread the epoxy evenly.
- Final Cure: Apply heat with a torch or heat gun to eliminate any bubbles, then let the entire table cure for an additional 8 hours.
Step 7: Finishing Touches
- Remove from Mold: Once fully cured, gently remove the table from the silicone mold.
- Sand the Edges: If there are any rough edges or imperfections, use sandpaper to smooth them out. You can also apply an additional coat of clear epoxy if needed for a perfect finish.
Conclusion
Your amazing golden leopard print table is now complete! This unique piece not only showcases your creativity but also serves as a functional art piece for any space. Enjoy your new table and the satisfaction of having crafted something truly special!

