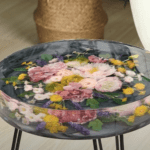
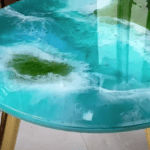
How to Create a Stunning Coffee Table with Epoxy Resin
Crafting a unique coffee table with epoxy resin is a rewarding project that can elevate your living space. Here’s a step-by-step guide to help you create a beautiful piece using olive wood, copper, and turquoise colors.
Materials Needed
- Olive wood (or wood of your choice)
- Epoxy resin
- Copper and turquoise pigment
- HDEP mold
- Heat gun
- Belt sander
- Planer
- Orbital sander (with 500 grit sandpaper)
- Oil (for finishing)
- Metal legs
- Drill
Step-by-Step Instructions
- Select Your Wood
Choose a wood you’re comfortable working with. For this project, we’ll use olive wood for its beautiful grain and durability. - Prepare the Epoxy
Mix the epoxy resin according to the manufacturer’s instructions. For a successful mix, aim for about 10 minutes of thorough mixing. If you notice any surface bubbles, use a heat gun to eliminate them. - Add Pigments
Incorporate the copper and turquoise pigments into separate portions of the epoxy. This will give your coffee table a stunning color contrast. - Pour into the Mold
Using an HDEP mold, pour both colors of epoxy on either side of the square mold, positioning the olive wood in the center. Make sure the wood is well-covered and the colors blend as desired. - Sanding and Shaping
Once the epoxy has cured, remove it from the mold. Use a belt sander to smooth the surface, followed by a planer for a more refined finish. Switch to an orbital sander and use 500 grit sandpaper to achieve a smooth surface. - Bevel the Edges
Change to a beveling bit on your sander to create attractive edges around the table. This adds a professional touch and enhances the overall design. - Apply the Flood Coat
Apply a flood coat of epoxy to the entire table surface. This will give it a glossy finish and additional protection. Use the heat gun again to remove any new bubbles that may form. - Finish the Underside
Sand the bottom of the table to 500 grit to ensure a smooth finish. Then, apply oil to the underside to preserve the wood and enhance its appearance. - Attach the Legs
Finally, drill in the metal legs to complete your coffee table. Ensure they are securely fastened for stability.
Conclusion
You’ve successfully created a stunning coffee table with epoxy resin! This unique piece combines the natural beauty of olive wood with vibrant colors, making it a perfect centerpiece for your living room. Enjoy your handcrafted coffee table and the conversations it inspires!

