New Tutorial! Flower Clock Made From Epoxy Resin
Creating an Amazing Flower Clock Out of Epoxy Resin
Crafting a stunning flower clock from epoxy resin is a beautiful way to blend art and functionality. By embedding dried flowers in epoxy, you can create a unique timepiece that adds a touch of nature to your decor. Here’s a step-by-step guide to help you create your own amazing flower clock.
Materials Needed
- Silicone circular mold
- Dried flowers (ensure they are completely dry)
- Black epoxy pigment
- Clear epoxy resin
- Heat gun
- Sandpaper (various grits)
- Clear coat finish
- Clock mechanism (including hands)
- Drill
- Glue
- Craft knife or utility knife
Instructions
1. Prepare the Mold
- Set Up: Start by choosing a silicone circular mold for your clock. Ensure it is clean and free from any debris.
2. Arrange the Dried Flowers
- Lay Out Flowers: Carefully arrange the dried flowers in the mold. Make sure they are completely dry to prevent any rotting or discoloration in the epoxy. Place the flowers in a design that you find visually appealing.
3. Mix and Pour Epoxy
- Prepare Black Epoxy: Mix the epoxy resin according to the manufacturer’s instructions. Add a small amount of black epoxy pigment to achieve a dark yet translucent effect.
- Pour the First Layer: Pour a layer of the darkened epoxy into the mold, covering the flowers completely. This will create a rich background for your clock.
- Add a Second Layer: Once the first layer has cured slightly (but is still tacky), prepare a lighter-colored epoxy mix. Pour this layer on top of the dark layer, creating a gradient effect. Use a heat gun to remove any bubbles that may form during the pouring process.
4. Cure and Finish the Clock Face
- Remove the Mold: After the epoxy has fully cured (refer to the manufacturer’s instructions), carefully remove the clock face from the mold.
- Sand the Surface: Use sandpaper to smooth out any rough edges or imperfections. Start with a coarser grit and gradually move to finer grits for a polished finish.
- Apply Clear Coat: Once sanded, apply a clear coat finish to enhance the shine and protect the epoxy.
5. Prepare for the Clock Mechanism
- Drill a Hole: Use a drill to create a hole in the center of the clock for the clock mechanism to fit through. Ensure the hole is the correct size for the mechanism you have.
- Mark the Numbers: Draw six lines in a star formation to designate the twelve areas for clock numbers. This will guide you in placing the numbers evenly around the clock face.
6. Attach the Numbers
- Glue Down the Numbers: Using strong adhesive, glue the numbers in place according to the lines you drew. Allow the glue to dry completely.
7. Encase the Numbers
- Add Another Layer of Epoxy: Place the clock mechanism back into the mold and pour another layer of clear epoxy over the clock face to encase the numbers securely. Make sure the mechanism is properly aligned.
8. Final Adjustments
- Cut a Section for the Mechanism: After the final layer has cured, cut a small section in the back of the clock for the clock mechanism to fit through.
- Assemble the Clock: Install the clock hands according to the manufacturer’s instructions, and ensure everything is working correctly.
Conclusion
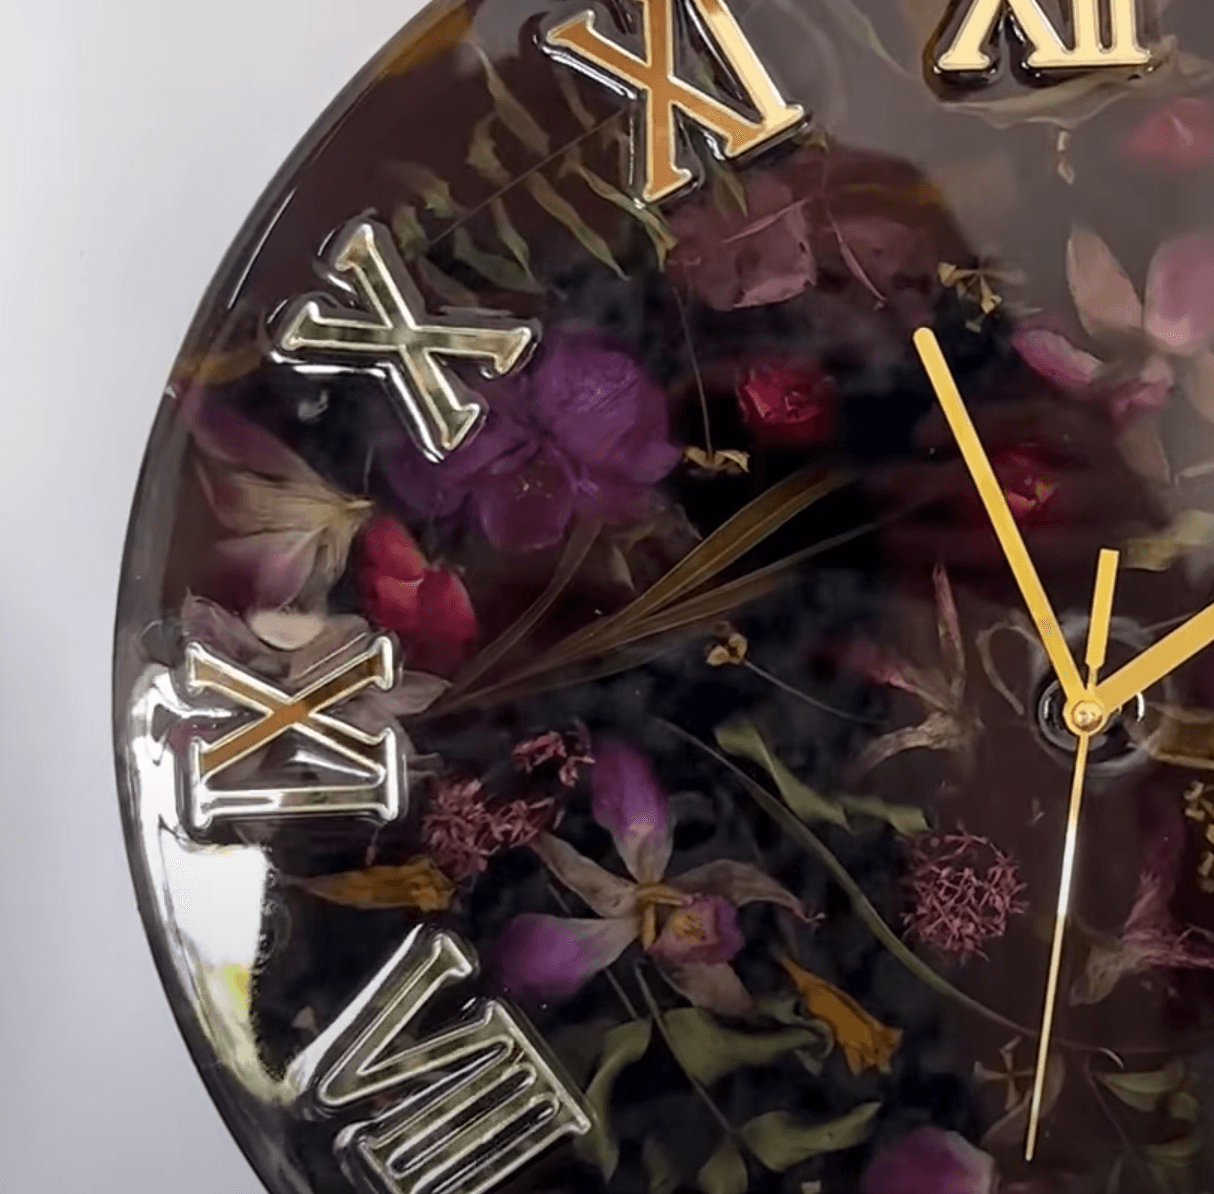
Your amazing flower clock is now complete! This unique timepiece not only serves a practical purpose but also showcases the beauty of dried flowers embedded in epoxy. Hang it on your wall or place it on a shelf to enjoy the vibrant colors and intricate designs every day. Enjoy your creation!


