Small Epoxy Resin Sea Table Tutorial
What You’ll Need:
Circular Silicone Mold
Epoxy Resin: Enough to fill your mold
Texture Sand: You can use any texture sand like baby powder or texture paste
Greenery: Small tree and shrub embellishments
Blue Dye: Ocean blue and light blue
White Dye
Turquoise Clear Coat
Darker Blue Epoxy
Solid White Epoxy
Hair Dryer-for effects
75% Alcohol Spray
Clear Coat Finish
Sandpaper
Table Legs -optional
Mixing Cups and Sticks
Gloves and Mask
Instructions
Step 1: Prepare Your Workspace
Setup: Set up in a well-ventilated area. Line your work surface with plastic or newspaper.
Safety first: Put on gloves and a mask to protect yourself from the fumes.
Step 2: Create the Shoreline
Mix the Epoxy: Start by preparing your epoxy resin, per directions on the manufacturer’s packaging.
Adding Texture: Combine the epoxy with either baby powder or texture paste, developing a sandy consistency.
Create Shoreline: Take this mixture and use it around the edge of your round mold to create a shoreline and any potential islands.
Step 3: Add Greenery
Place Decorations: Set small trees and shrubs in the sandy mixture, positioning appropriately for a natural look.
Step 4: Prepare the Ocean
Ocean Blue Epoxy Mix: Mix the blue dye and white dye in a separate cup to get a sky blue-colored epoxy. Pour the ocean part with it by filling the middle part of the mold.
Apply Turquoise Coat: Lightly cover the greenery with the turquoise clear coat so it gives a little shine.
Step 5: Add Ocean Depths
Darker Blue Epoxy: Add a little darker blue epoxy in the middle of the water area for depth.
Light Blue Epoxy: For the gradient effect, start pouring solid light blue toward one side of the table.
Step 6: Wave Patterns
White Epoxy Streaks: Make wave patterns on the surface using streaks with the help of solid white epoxy.
Blend w/ Hair Dryer: Use a hair dryer on low to blend the blues and whites into dynamic wave patterns. Move carefully to avoid splatter.
Step 7: Color Adjustments
Building Waves: Add more white in the lighter areas and use the hair dryer to blow for more crashing wave effects.
Distribute Excess White: In case the place gets too much white, sprinkle a little 75% alcohol lightly and the epoxy will redistribute to get the perfect look.
Step 8: Allow the Curing
Time of Curing: Allow the table to set for 24 hours untouched.
Step 9: Final Touches
Sand to Smooth: Lightly sand over the surface after initial cure to smoothen it.
Apply Clear Coat: Apply a clear coat finish once sanded to protect your artwork.
Add Legs: Using glue, attach your chosen legs onto the bottom of the table for support.
Enjoy Your Sea Table!
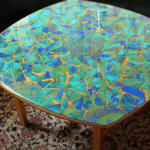
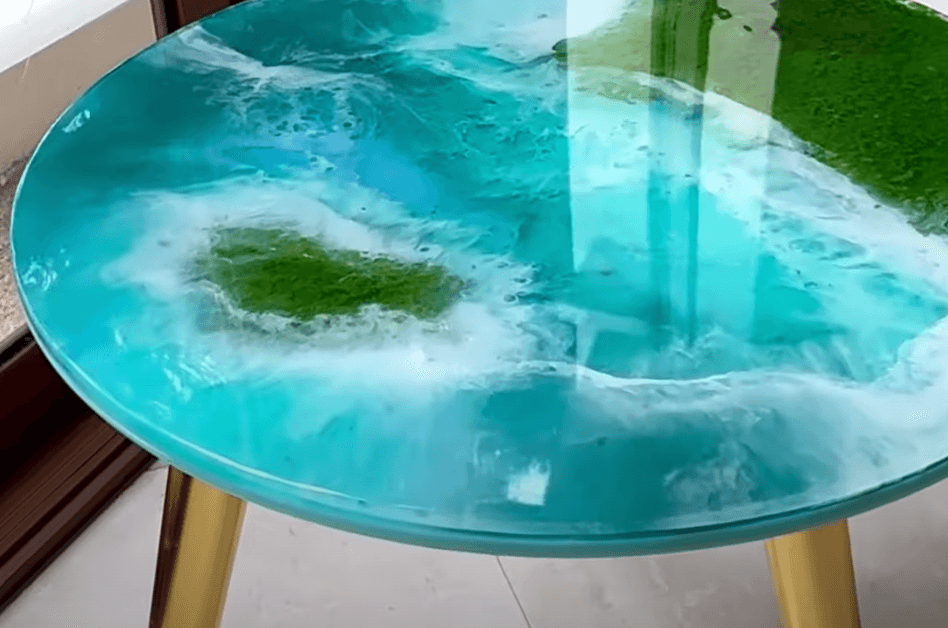
Let it dry and be secure; your small epoxy resin sea table is ready to show off! It’s going to be so beautiful, really popping in whatever room you put it in and capturing that perfect shot of the ocean. Happy crafting!
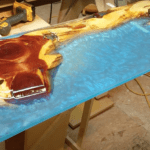
Transform a simple circular mold into a stunning small sea table with this step-by-step epoxy resin tutorial. This project will give you a beautiful ocean scene, complete with a shoreline, greenery, and mesmerizing waves.
What You’ll Need
- Circular Silicone Mold
- Epoxy Resin: Enough to fill your mold
- Texture Sand (e.g., baby powder or texture paste)
- Greenery: Small tree and shrub embellishments
- Blue Dye: Ocean blue and light blue
- White Dye
- Turquoise Clear Coat
- Darker Blue Epoxy
- Solid White Epoxy
- Hair Dryer (for effects)
- 75% Alcohol Spray
- Clear Coat Finish
- Sandpaper
- Legs for Table (optional)
- Mixing Cups and Sticks
- Gloves and Mask (for safety)
Instructions
Step 1: Prepare Your Workspace
- Set Up: Choose a well-ventilated area and cover your workspace with plastic or newspaper.
- Safety First: Put on gloves and a mask to protect yourself from fumes.
Step 2: Create the Shoreline
- Mix the Epoxy: Prepare your epoxy resin according to the manufacturer’s instructions.
- Combine with Texture: Mix the epoxy with your chosen texture sand (baby powder or texture paste) to create a sandy consistency.
- Shape the Shoreline: Spread this mixture around the edge of your circular mold to form a shoreline and any potential islands.
Step 3: Add Greenery
- Place Decorations: Insert small trees and shrubs into the sandy mixture, positioning them as desired for a natural look.
Step 4: Prepare the Ocean
- Mix Ocean Blue Epoxy: In a separate cup, combine blue dye and white dye to create a sky blue epoxy. Pour this into the center of the mold to form the ocean.
- Apply Turquoise Coat: Use the turquoise clear coat to lightly cover the greenery, adding a touch of shine.
Step 5: Create Ocean Depths
- Darker Blue Epoxy: Pour a darker blue epoxy in the center of the water area for depth.
- Light Blue Epoxy: Pour a solid light blue towards one side of the table to create a gradient effect.
Step 6: Add Wave Patterns
- White Epoxy Streaks: Use solid white epoxy to draw streaks across the surface, simulating waves.
- Blend with Hair Dryer: Use a hair dryer on a low setting to mix the blues and whites, creating dynamic wave patterns. Move the dryer gently to avoid splattering.
Step 7: Adjusting Colors
- Enhance Waves: Add more white in the lighter areas and use the hair dryer to create more crashing wave effects.
- Distribute Excess White: If certain areas have too much white, lightly spray with 75% alcohol to redistribute the epoxy and achieve the desired look.
Step 8: Let It Cure
- Cure Time: Allow the table to cure for 24 hours undisturbed.
Step 9: Final Touches
- Sand for Smoothness: After the initial cure, lightly sand the surface to smooth it out.
- Apply Clear Coat: Once sanded, apply a clear coat finish to protect your artwork.
- Add Legs: Glue your chosen legs onto the bottom of the table for support.
Enjoy Your Sea Table!
Once everything is dry and secure, your small epoxy resin sea table is ready to display! This beautiful piece will be a striking addition to any room, capturing the essence of the ocean. Happy crafting!

