Creating a River Dining Table with Pine Wood and Epoxy
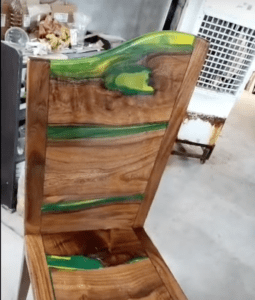
Building a river table is an exciting project that combines the beauty of natural wood with the artistic potential of epoxy resin. The process described here involves using long pine wood planks, a bit of woodworking skill, and epoxy to create a stunning piece of furniture. Here’s how to build your very own river table step by step.
Materials Needed:
- 2 slices of long pine wood
- Plywood (flat piece)
- Wood planer
- Saw (for cutting wood)
- Epoxy resin (preferably a river table kit with colorants)
- Wood pegs and sticks
- Wood base for mounting
- Wood finish (oil, polyurethane, or your preferred finish)
- Wood staples or clamps
- Sandpaper (for smoothing edges and surface)
- Measuring tape
- Stir sticks and mixing cups for epoxy
Step-by-Step Guide:
1. Prepare the Wood Planks
Start by selecting two slices of long pine wood. The quality of the wood will affect the final look of your table, so choose planks that are relatively straight and free from major defects.
- Plane the Wood: Use a wood planer to flatten the surface of the pine wood slices. This step ensures that both sides of the planks are smooth and even.
- Square the Edges: Cut a squared edge along each side of the planks using a saw or planer. This is crucial for a neat, professional appearance, especially when joining the wood to the plywood.
- Remove Bark: Use a scraper or chisel to remove any bark or rough edges from the pine wood slices, revealing the smooth grain of the wood.
2. Prepare the Mold Area
- Create the Mold: Lay the two pine slices flat on a surface and place a flat piece of plywood on top of them, aligning the squared edges. Staple the plywood to the pine planks, ensuring that the edges are tightly secured. The plywood will create a mold for the epoxy to flow into.
- Check for Gaps: Flip the assembly over and inspect the underside. There should be a raised gap between the two pine planks, which will be filled with epoxy to create the “river” effect.
3. Cut and Place the Logs
- Cut Logs to Size: Measure and cut small logs or branches into slices that match the height of the mold area between the pine planks. These log slices will serve as decorative elements within the epoxy river.
- Arrange the Logs: Place the log slices inside the mold, arranging them creatively to mimic the flow of a river. This is where you can get artistic, arranging the logs to create a natural, winding pattern.
4. Mix and Pour Epoxy
- Mix the Epoxy: Follow the instructions on your epoxy kit. Typically, you will mix the resin and hardener in a specific ratio. You can also add colorant to the epoxy to create a more vibrant or earthy look for the river flow.
- Pour the Epoxy: Pour the mixed epoxy into the mold, covering the logs and filling the spaces between the pine planks. Use a stir stick to carefully distribute the epoxy into all the nooks and crannies, ensuring that the logs are fully submerged. Allow the epoxy to settle and level out.
- Wait for Curing: Let the epoxy cure for the recommended time, usually 24-48 hours, depending on the manufacturer’s instructions.
5. Assemble the Table
- Attach Pegs and Sticks: Once the epoxy has cured, you will need to create holes in the wood to attach it to a base. Drill holes into the sides of both pine planks and insert wooden pegs or sticks to align and hold the planks together.
- Mount on Base: Prepare a solid wood base for the table. This could be a simple rectangular frame or custom-designed legs. Attach the two epoxy-filled wood planks to the base, ensuring they are securely mounted.
6. Finishing Touches
- Sand and Smooth the Edges: Sand the edges and surface of the table to remove any rough spots or imperfections from the epoxy and wood. Start with a coarse sandpaper and move to a finer grit for a smooth finish.
- Apply a Finish: Once the table is smooth and dust-free, apply your preferred wood finish (oil, polyurethane, or a similar product) to enhance the natural beauty of the wood and protect the surface. Be sure to follow the manufacturer’s instructions for application and drying times.
Conclusion:
By following these steps, you can create a unique river table that blends the organic beauty of pine wood with the modern, striking effect of epoxy resin. Whether you’re looking for a functional piece of furniture or an artistic statement, this DIY project offers a rewarding experience and a one-of-a-kind table for your home or office. Enjoy your craftsmanship and the compliments sure to come your way once it’s completed!

