DIY Crafting an Epoxy Resin Burl Bowl
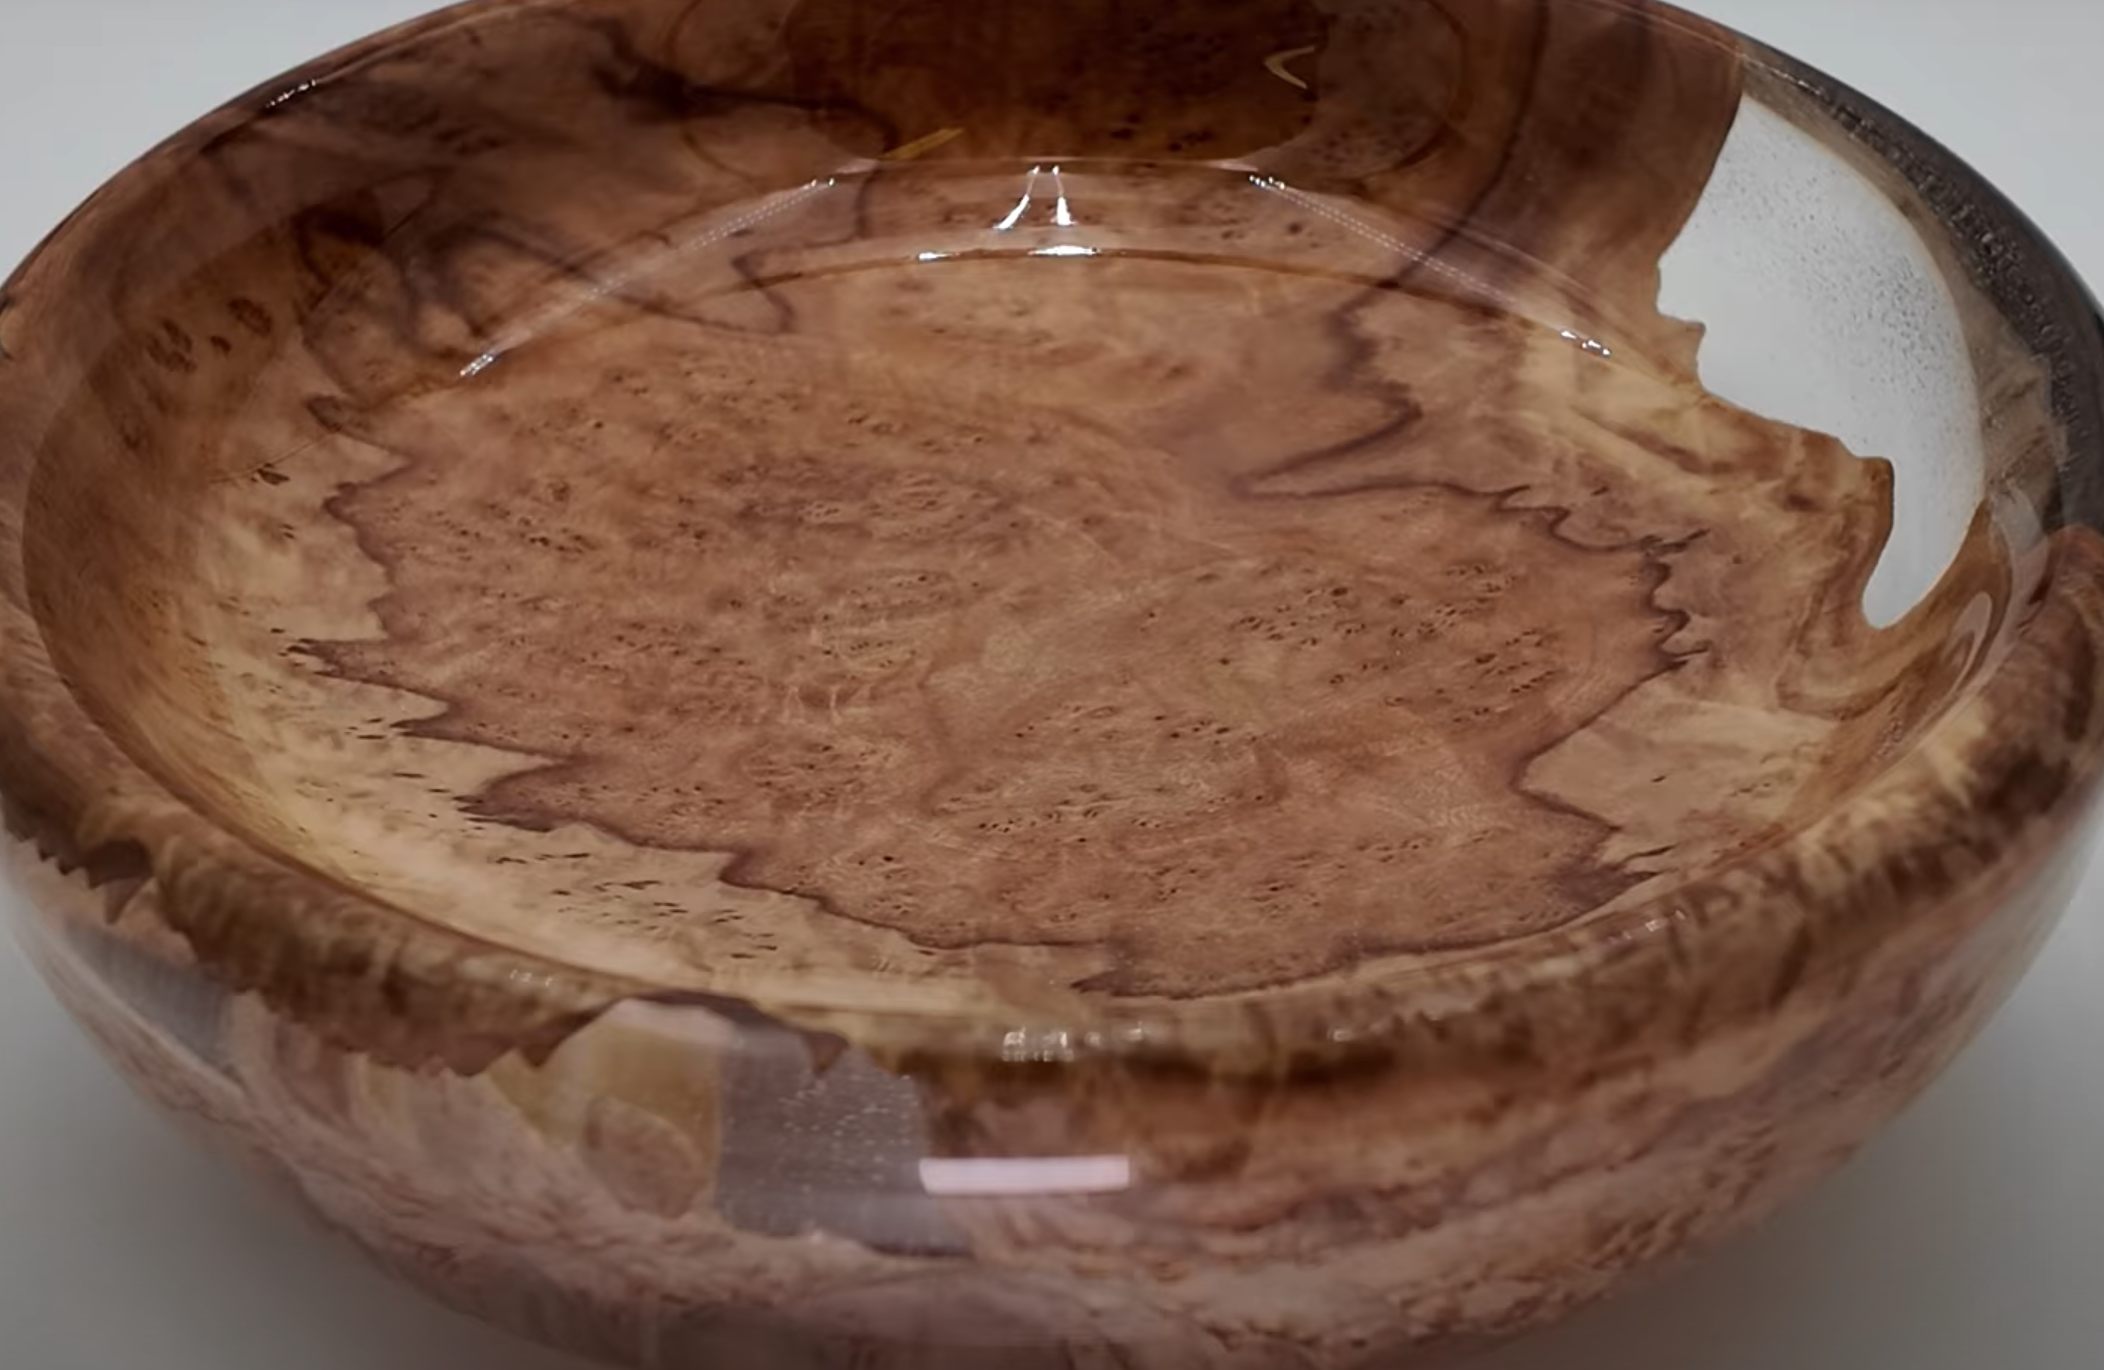
Make a unique and beautiful bowl using a wood burl and clear epoxy resin, a beautiful project that combines both woodworking and resin casting. This process allows you to create an intricate piece of art by embedding natural wood into a transparent resin matrix, resulting in a striking contrast of textures and colors. Whether you’re an experienced woodworker or a resin enthusiast looking to explore new techniques, this guide will walk you through the steps to make your very own resin-embedded burl bowl from start to finish.
Materials Needed:
- Wood Burl: A small burl, sized to fit inside your silicone mold.
- Clear Epoxy Resin: For embedding the burl and creating a smooth finish.
- Silicone Mold: A tall, circular mold to hold the epoxy and wood burl.
- Lathe: For turning the resin block into the shape of a bowl.
- Sandpaper: Various grits (80, 220, 400, 600, 1000+) for smoothing the bowl.
- Epoxy Finish: For sealing and enhancing the surface of the bowl.
- Metal Decal: To add a decorative touch to the bottom of the bowl.
- Resin Clear Coat: To provide a glossy, protective layer over the finished piece.
- Adhesive: Strong glue for attaching the metal decal.
- Mixing Cups and Stir Sticks: For resin preparation.
Step-by-Step Process:
1. Prepare the Wood Burl
Start by selecting a wood burl that fits comfortably inside your silicone mold. The burl should be free of cracks or defects, as these could compromise the final piece. If needed, trim the burl to a size that will fit neatly within the mold, leaving a bit of space for the epoxy resin.
2. Mix and Pour the Epoxy Resin
Once the burl is ready, set your silicone mold on a flat, level surface. Mix the clear epoxy resin according to the manufacturer’s instructions, typically a 1:1 ratio of resin to hardener. Stir the resin thoroughly to avoid any air bubbles.
Pour the mixed resin into the mold, enough to fully submerge the wood burl. Carefully place the burl into the resin, ensuring it is completely covered. If necessary, add more resin to completely encase the burl. Let the resin cure for 24-48 hours, depending on the resin type, ensuring a strong, solid base.
3. Remove the Burl from the Mold
Once the epoxy has fully cured, carefully remove the resin-embedded burl from the mold. You should now have a solid, clear resin cylinder with the burl visible inside. This block will be your canvas for turning.
4. Mount the Resin Block on the Lathe
Place the resin block securely onto your lathe. Start turning the block slowly to remove the bulk of the material and shape it into a smooth, symmetrical bowl. When turning resin, use sharp tools to avoid burning the material or creating jagged edges. Take your time as you work your way from the outside to the center of the block, gradually hollowing out the interior of the bowl.
5. Sand the Bowl
Once you have shaped the bowl, it’s time to sand it. Start with coarse-grit sandpaper (around 80 or 120 grit) to smooth out any tool marks and rough surfaces. Gradually move to finer grits (220, 400, 600, and beyond) to achieve a smooth, polished surface. If you prefer a finer finish, wet-sanding is an option that helps minimize dust and achieve a glass-like surface.
6. Apply the Epoxy Finish
After sanding, apply a thin layer of epoxy finish to the bowl. This will provide a smooth, glossy surface and enhance the natural beauty of the resin and wood. Follow the instructions for your particular finish, allowing it to cure fully before continuing. If necessary, sand lightly between coats to remove any imperfections.
7. Add the Metal Decal
Once your bowl is finished and fully cured, it’s time to add a decorative touch. Carefully place a metal decal or logo on the bottom of the bowl. Use a strong adhesive to ensure the decal stays in place, and allow it to set completely.
8. Apply the Final Clear Coat
To protect the bowl and add a final glossy sheen, apply a clear resin coat over the entire piece. This will not only enhance the appearance but also seal the surface for durability. Allow the clear coat to cure thoroughly, following the manufacturer’s instructions.
9. Final Sanding and Polishing
After the clear coat has cured, perform any necessary light sanding (using fine grit, like 800-1000 grit) to remove imperfections, dust, or small bubbles that may have formed in the final coating. Polish the bowl with a microfiber cloth to achieve a shiny, flawless finish.
Conclusion
Creating a resin-embedded burl bowl is a satisfying and creative process that results in a stunning, one-of-a-kind piece. By combining the natural beauty of the wood burl with the clarity of epoxy resin, you can craft a functional and decorative bowl that showcases the intricate patterns of the wood. The key to success lies in patience and attention to detail, from the initial mold pouring to the final sanding and finishing touches.
With the right tools and techniques, you can transform a simple burl and resin into a work of art that’s sure to be admired. Whether you choose to keep the bowl for yourself or gift it to someone special, the result will undoubtedly be a beautiful conversation piece and a testament to your craftsmanship. Happy crafting!

