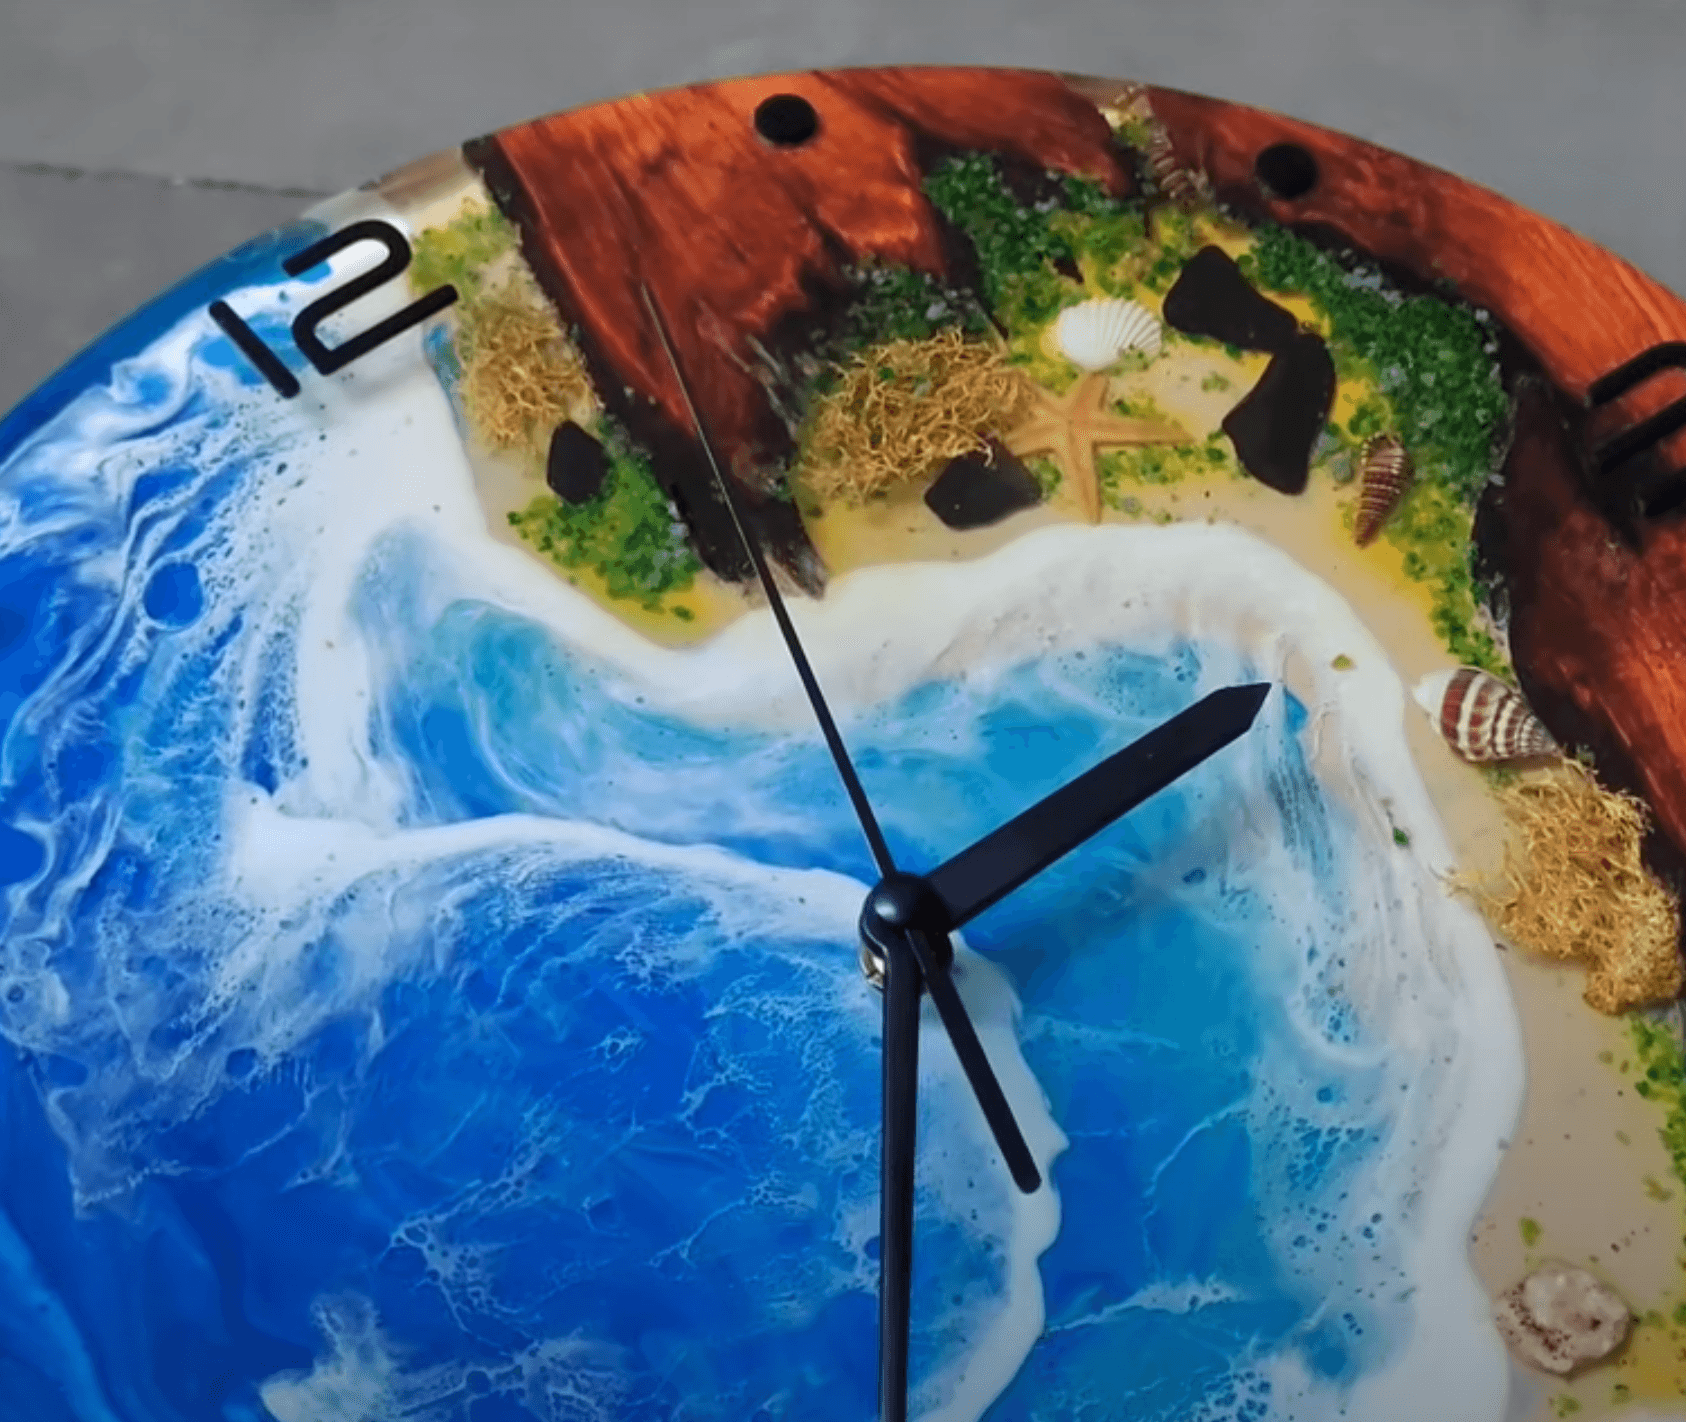
DIY Epoxy Resin Clock – Ocean Epoxy Artwork Tutorial
Ready to bring a piece of the ocean into your home? This easy-to-follow guide will walk you through the process of creating a mesmerizing epoxy resin clock that captures the beauty of the underwater world. With just a few simple materials and a bit of creativity, you can craft a unique and stunning timepiece. Let’s dive in!
Materials:
- Circular silicone mold (or plastic stripping and sealant to create your own)
- Wood piece (half-circle or less)
- Brown epoxy resin
- Blue epoxy resin (multiple shades)
- Clear epoxy resin
- Epoxy pigment (brown, blue, white)
- Glitter
- Sand
- Small shells and sea glass
- Clock mechanism
- Drill
- Sandpaper
- Clear coat
Instructions:
- Prepare the Mold:
- If using a silicone mold, ensure it’s clean and dry.
- If creating your own mold, use plastic stripping and sealant to form a circular shape on a flat surface.
- Create the Base:
- Place the wooden piece in the center of the mold.
- Mix brown epoxy resin with glitter and sand to create a beach effect.
- Pour the mixture around the wooden base, covering it completely.
- Add the Ocean:
- Mix different shades of blue epoxy resin to create a wave-like effect.
- Pour the blue epoxy over the brown base, allowing it to flow and create natural-looking waves.
- Create the Wave Foam:
- Mix white epoxy pigment with clear epoxy resin.
- Apply the white mixture to the edge between the brown and blue sections.
- Use a heat gun to spread the white mixture, creating a foamy wave effect.
- Add Ocean Accents:
- Place small shells and sea glass on the surface of the epoxy.
- Cure the Epoxy:
- Allow the epoxy to cure completely according to the manufacturer’s instructions.
- Prepare for the Clock Mechanism:
- Once cured, sand the surface of the epoxy to smooth it out.
- Measure and mark the positions for the clock numbers.
- Drill a hole in the center of the wooden base for the clock mechanism.
- Assemble the Clock:
- Attach the clock mechanism to the wooden base, following the manufacturer’s instructions.
- Add the clock hands.
- Final Touches:
- Apply a clear coat to protect the epoxy and enhance its shine.
Tips:
- Experiment with Colors: Try different shades of blue and brown to create unique ocean scenes.
- Add More Depth: Incorporate other marine elements like seaweed or small fish.
- Customize Your Clock: Add personal touches like a favorite quote or a special message.
With a little creativity and patience, you can create a stunning ocean-themed epoxy resin clock that will be the centerpiece of any room.


