How to Make a Pine Log Epoxy Chair DIY
Looking for a truly unique and stunning piece of furniture to complement your cabin? Look no further than a beautiful, handmade wood and epoxy chair! This stylish and durable chair combines the natural warmth of pine with the sleekness of epoxy resin, creating a modern yet rustic aesthetic. Perfect for cozy cabins or as a statement piece in any home, this DIY project will guide you step-by-step to build your very own one-of-a-kind chair.
Step 1: Preparing Your Materials
To start, you’ll need a variety of materials to create this masterpiece. Here’s what you’ll need:
- Pine Wood Logs:
- 3-4 logs of sturdy pine wood (choose a variety like pine, oak, or walnut) for the legs and base.
- Additional wood logs (or wooden planks) cut into 4-5 inch lengths for filling the mold.
- Epoxy Resin:
- High-quality epoxy resin (both resin and hardener) for the chair’s body and coating.
- Epoxy dye for coloring the resin (choose a color that suits your design, such as a vibrant blue, amber, or clear).
- Mold Materials:
- Bucket with a cut-out bottom (this will act as your mold for the epoxy).
- Wood base (a flat, sturdy piece of wood to secure the bucket/mold).
- Strong tape (to secure the mold to the base and ensure no leaks).
- Tools:
- Measuring tape for accurate measurements.
- Saw (to cut logs and wood pieces to size).
- Sanding tools (e.g., sandpaper, an electric sander, or sanding block) for smoothing and beveling edges.
- Brush or roller (for applying epoxy coats on the legs and base).
- Heat gun (to remove air bubbles from the cured resin).
- Finishing Materials:
- Clear epoxy topcoat (for sealing and enhancing the legs and base of the chair).
- Protective gloves (for working with epoxy).
- Plastic drop cloth or newspaper (to protect your work surface).
- Safety Equipment:
- Respirator or mask (to protect from fumes when mixing or working with epoxy).
- Safety goggles (to protect your eyes during sanding or using the heat gun).
This list includes everything you need to create a beautiful and durable wood and epoxy chair! Be sure to work in a well-ventilated area and take all necessary safety precautions.
Step 2: Crafting the Chair’s Mold
Start by preparing your mold. Using the bucket with the cut-out bottom, secure it onto a solid base (like a piece of wood) using strong tape to keep everything in place. The cut-out bottom of the bucket will give you the desired shape, while the base will provide stability. Make sure that the bucket is upright and firm.
Next, take three logs of equal size for the legs of the chair. Cut them to your desired length (around 4–5 inches works well for a sturdy leg). Place these logs evenly at the base of the mold, making sure they are properly aligned and spaced apart.
Step 3: Filling the Mold with Wood Pieces
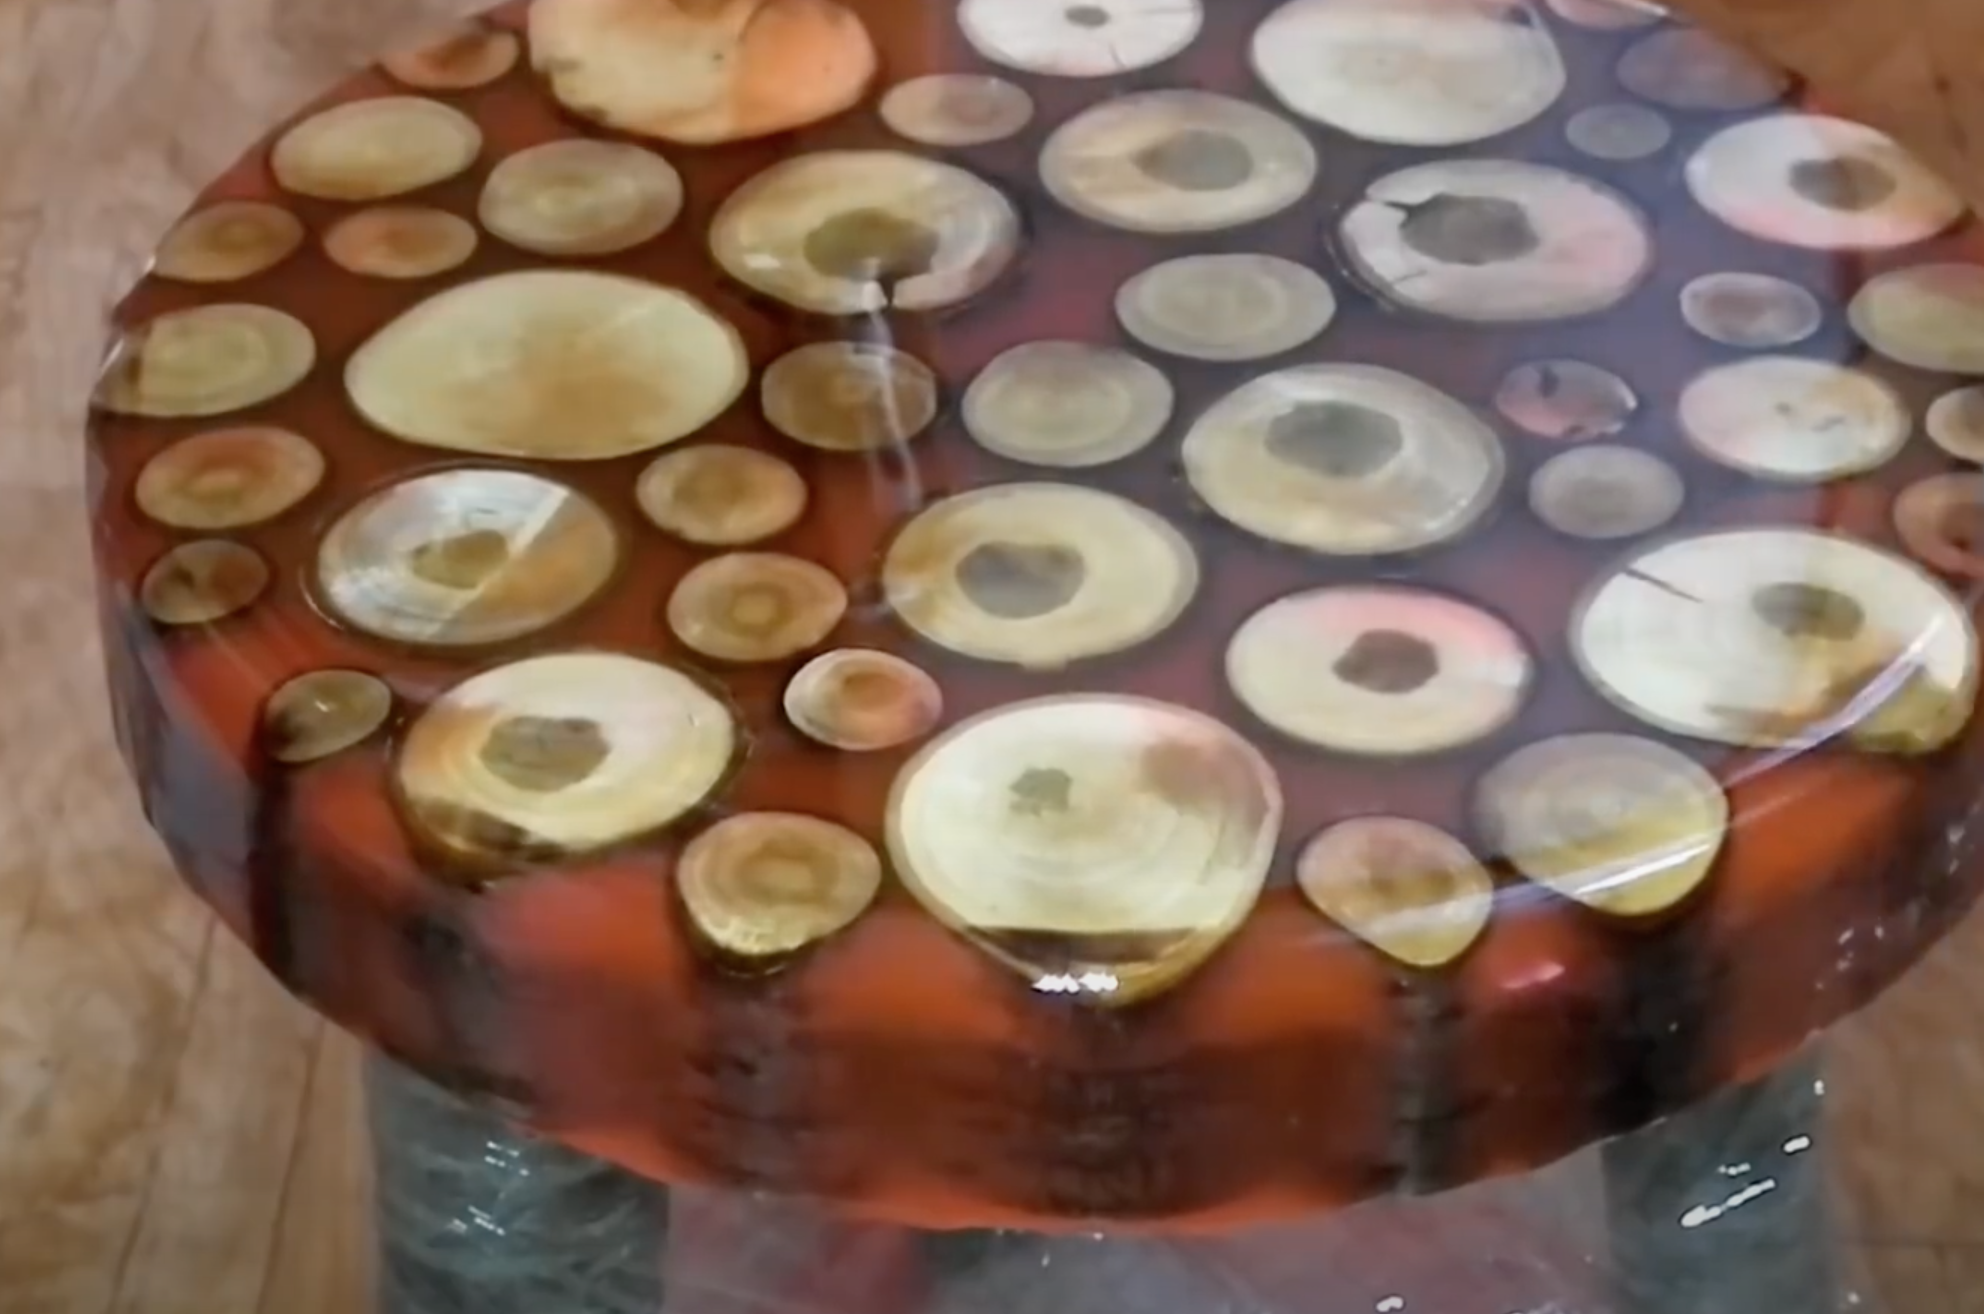
With the mold in place, it’s time to fill it with your carefully selected wood logs. Cut your wood into 4-inch lengths—these will form the body of your chair. Arrange the pieces tightly, packing them into the mold. Be sure to fill every gap with smaller pieces of wood to create a solid and tight structure. This will give your chair a natural, rustic look and provide strength to the final product.
Step 4: Mixing and Coloring the Epoxy
Now for the fun part—mixing the epoxy resin. Follow the instructions carefully to combine the resin and hardener. Once mixed, add a small amount of epoxy dye in your preferred color. The color will give the chair a striking look and can match any color scheme. Stir the mixture thoroughly, ensuring that the dye is evenly distributed throughout.
Step 5: Pouring the Epoxy
With the mold and the wood in place, it’s time to pour the epoxy resin mixture into the mold. Slowly and evenly pour the resin over the packed wood logs, allowing it to fill the spaces between the pieces. Use a spatula or stick to gently move the mixture around and ensure it reaches every gap. The resin should ooze into every crevice, enveloping the wood while giving it a beautiful, glossy finish.
Allow the epoxy to cure as per the manufacturer’s instructions. This could take anywhere from 12 to 24 hours depending on the type of epoxy used.
Step 6: Removing the Mold and Sanding the Edges
Once the epoxy has fully cured, it’s time to remove the mold. Gently peel back the bucket and base, revealing the stunning wood and epoxy combination. At this point, your chair’s structure will be almost complete, but it needs a little refinement.
Take your sanding tools and smooth out any rough or uneven edges. This step will give your chair a more polished and professional look. Pay special attention to the corners, edges, and surfaces that will be exposed.
To enhance the look even further, bevel the edges of the chair. This gives a more refined, elegant finish that highlights the natural curves of the wood.
Step 7: Adding the Epoxy Coat to the Legs and Base
To finish off the chair, it’s time to treat the legs and base with an epoxy clear coat. This will seal the wood, making it more durable and water-resistant, while enhancing the natural grain of the wood. Apply the clear epoxy using a brush or roller, making sure to coat the legs and base evenly. Let it cure properly for the best finish.
Step 8: Final Touches and Bubble Removal
As the epoxy on the legs and base cures, use a heat gun to remove any air bubbles that may have formed in the epoxy. Hold the heat gun a few inches away from the surface and gently move it in circular motions. The heat will cause the bubbles to rise and pop, leaving behind a smooth and flawless surface.
Step 9: Admire Your Creation
Once everything is fully cured, sand the surface lightly for a smooth finish. Now, step back and admire your stunning wood and epoxy chair! It’s a work of art—a perfect blend of natural wood and vibrant epoxy resin that’s sure to add character to any space. This unique piece will be the perfect addition to any cabin, offering both rustic charm and modern style.
Conclusion
Crafting a pine wood and epoxy chair is a rewarding project that will result in a gorgeous, one-of-a-kind piece of furniture. Whether you’re looking to enhance your cabin with a cozy and eye-catching chair or want to add a personal touch to your home décor, this DIY project combines craftsmanship with creativity. The rich color of the epoxy and the natural beauty of the pine will create a statement piece that lasts for years to come. So gather your materials, get your hands dirty, and enjoy the process of creating a masterpiece for your cabin!


