Resin Galaxy style Flower Blooms Tutorial
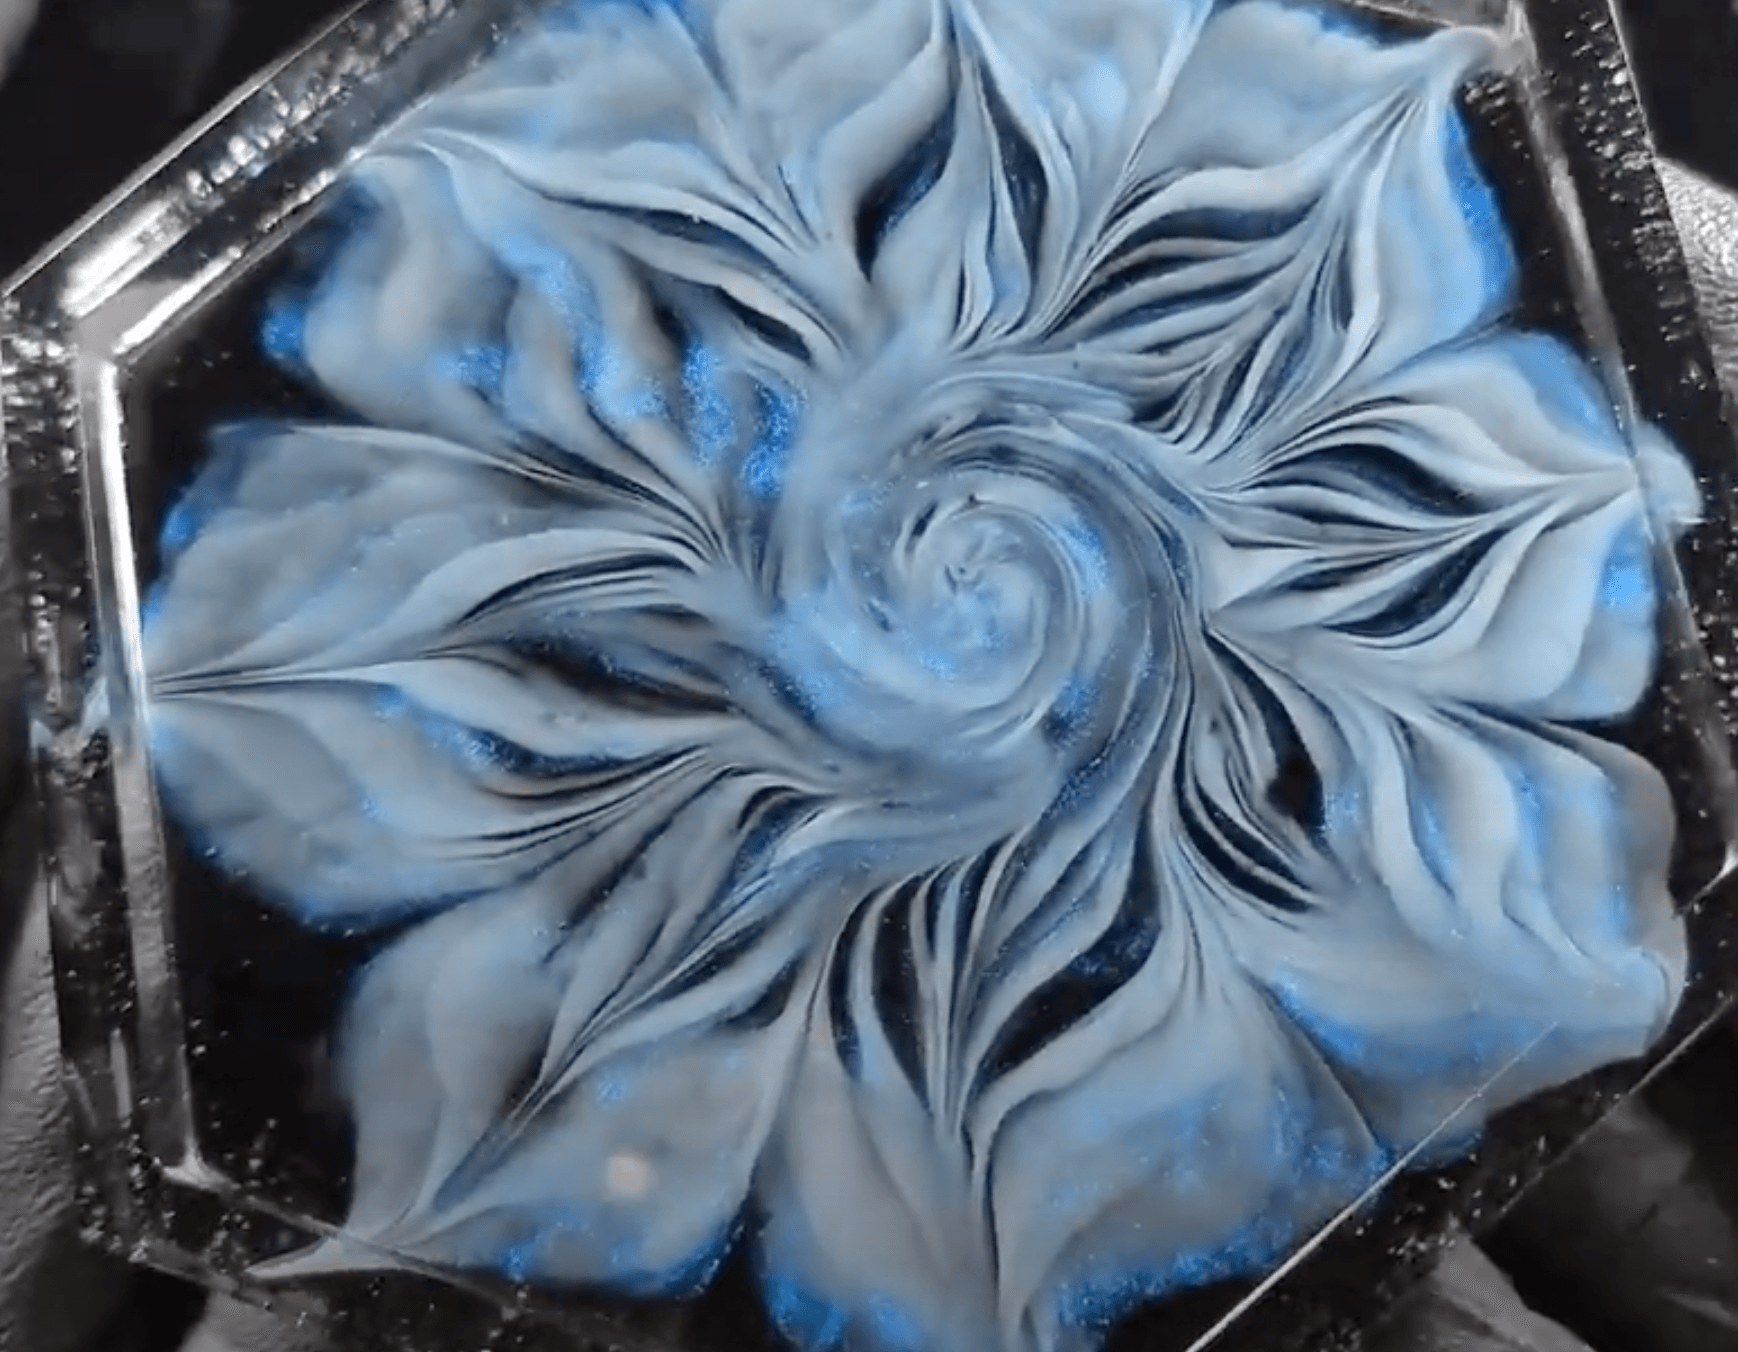
One of the most enchanting styles within resin art is the “Galaxy Flower Bloom” technique, which combines rich colors and mesmerizing effects. In this tutorial, we’ll guide you through the process of making beautiful flower blooms using pearl copper, pearl purple, and pearl blue epoxy pigments, enhanced by white epoxy paste and a touch of black alcohol ink. Using hexagon silicone molds, you’ll learn how to layer colors and create delicate blooms that shimmer and shine. Whether you’re a seasoned resin artist or a beginner looking to explore this exciting craft, this step-by-step guide will help you create eye-catching pieces that capture the beauty of a galaxy in bloom. Let’s dive in!
Materials Needed
- Epoxy Resin
- Pearl Copper Epoxy Pigment
- Pearl Purple Epoxy Pigment
- Pearl Blue Epoxy Pigment
- White Epoxy Pigment Paste
- Hexagon Silicone Coaster Molds
- Mixing Cups
- Stir Sticks
- Piping Bags (like frosting bags)
- Metal Tool for Drawing Lines
- Black Alcohol Ink
- Heat Mat
Instructions
Step 1: Prepare the Resin
- Mix the Resin: Measure and mix your epoxy resin according to the manufacturer’s instructions. Aim for a working temperature around 30°C. Allow it to sit for about 15 minutes to eliminate bubbles.
Step 2: Prepare the Pigments
- Add Pigments: Once the resin is ready, divide it into separate cups. Add pearl copper, pearl purple, and pearl blue pigments to individual cups, along with white epoxy pigment paste. Mix thoroughly.
- Fill Piping Bags: Transfer each colored resin into its own piping bag for easier application.
Step 3: Pouring the Resin
- Clear Base Layer: Pour a thin layer of clear epoxy resin into the hexagon silicone molds to create a base layer.
- Spiraling Colors:
- Start with the pearl copper. Squeeze it from the center of the mold outward in a spiral pattern.
- Next, use the white epoxy pigment paste, applying it in a thicker spiral around the copper.
Step 4: Creating the Bloom Effect
- Draw the Blooms: Using a metal sharp tool, gently draw lines from the outside of the mold inward along the spiral. This motion creates a bloom effect around the radius.
- Then, from the center outward, draw a line down the middle of each bloom to create distinct tips for each one.
Step 5: Adding the Finishing Touches
- Add Black Alcohol Ink: Drip black alcohol ink over the entire piece to enhance the depth and contrast.
- Set and Cure: Let the molds sit undisturbed for about 3 hours. To speed up the curing process, place them on a heat mat.
Final Thoughts
Once fully cured, demold your beautiful resin galaxy flower blooms. The shimmer and vibrant colors create a stunning effect perfect for coasters or decorative pieces. Enjoy your stunning creations!

