Epoxy Resin Mask DIY with Homemade Silicone Mold
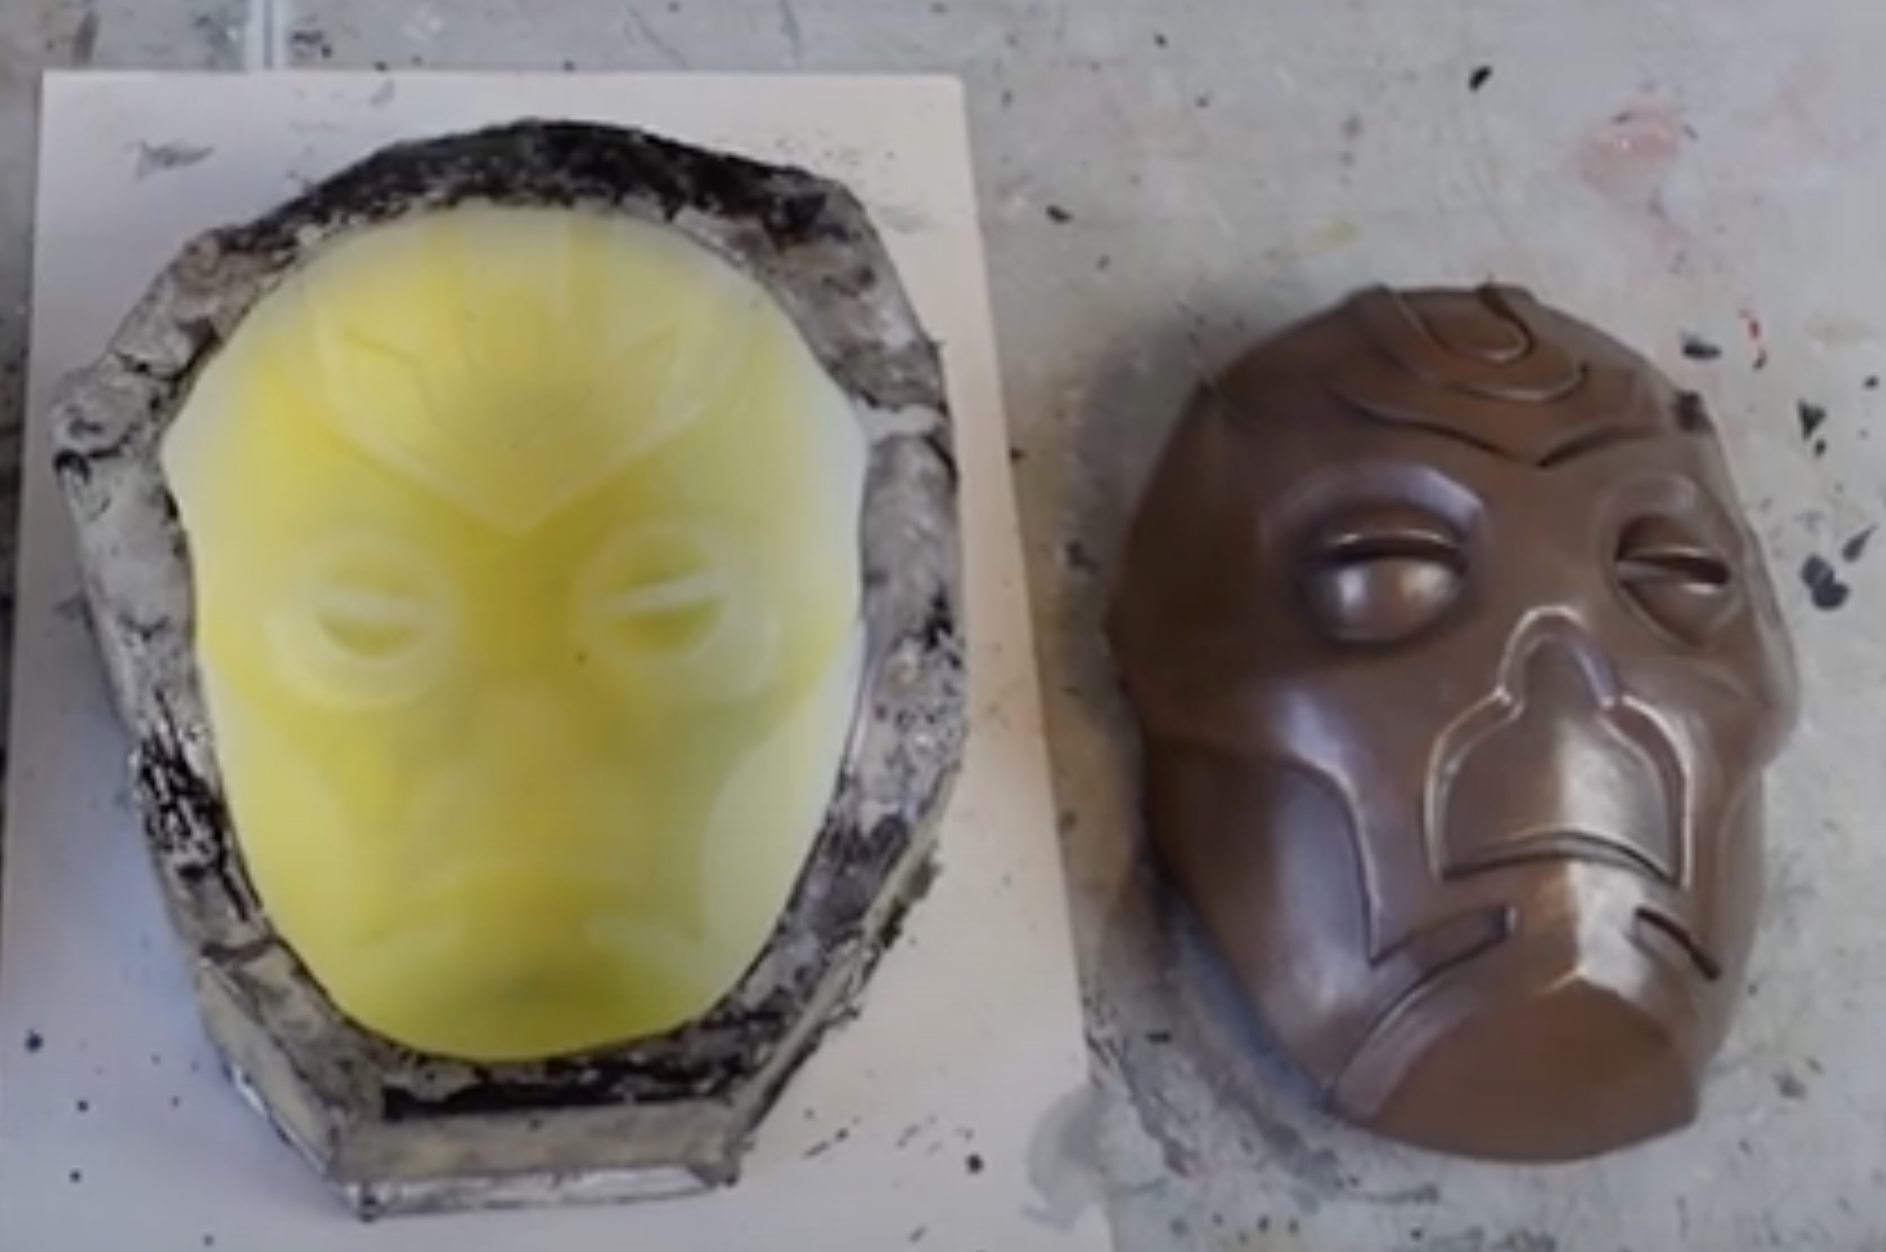
Creating a custom epoxy resin casting mask is a detailed, multi-step process that involves sculpting, molding, and pouring resin to achieve a sleek, professional-looking mask. This guide will walk you through the entire process—from building the base structure and preparing the mold to pouring the resin and achieving that shiny, metal-like finish. Whether you’re making a prop, costume accessory, or special-effects mask, this technique can be adapted to suit your creative vision.
Materials Needed:
- Mannequin head or head shape (foam or plaster)
- Clay (for bulking out the head)
- Clear film or plastic wrap
- Masking tape
- Foam sheets (for building the mask)
- Hot glue gun and glue sticks
- Sandpaper or sander
- Mod Podge (or another sealer)
- Foam board (for building the mold walls)
- Mold release spray
- Two-part silicone rubber (for mold making)
- Plaster bandages (for creating a strong base mold)
- Bronze powder (for adding metallic sheen to the resin)
- Epoxy resin (two-part, with black dye)
- Respirator (for safety)
- Metal wool (for polishing the resin mask)
- Mixing cups, stir sticks, and disposable gloves
Step-by-Step Instructions:
1. Prepare the Base Shape
Start with a mannequin head or a head-shaped form (it can be foam or plaster). This will serve as the foundation for your mask.
- Bulk Out the Shape: If the head is not already the desired size or shape, use clay to bulk it out. Add a layer of clay to areas where you want more volume. This helps create a more realistic mask that will fit properly once completed.
- Cover with Clear Film: To prevent any clay from sticking to the mold, cover the entire head with clear plastic film. This layer will also help protect the original head form.
- Apply Masking Tape: Once the head is wrapped, apply masking tape over the surface, making sure to press it tightly against the contours of the form. This tape will act as a template for creating the mask design.
2. Transfer the Tape Template to Foam
- Draw the Design: Use a pen or marker to draw the outline of your mask directly on the surface of the masking tape. This is where your mask’s final design will begin to take shape.
- Cut the Tape: Carefully cut the tape into pieces that correspond to the sections of the mask. These pieces will serve as the “pattern” for your mask.
- Transfer to Foam: Once you’ve cut the tape into sections, transfer each piece to foam sheets by laying the pieces over foam and drawing the design. Cut the foam pieces out following the template shapes.
3. Build the Mask Using Foam
- Glue the Foam Pieces Together: Start assembling the foam pieces into the shape of your mask. Use a hot glue gun to attach the foam pieces together, making sure to align them properly to maintain the shape of the mask.
- Heat Forming: If needed, use a heat gun to gently heat the foam, making it more pliable and easier to form around curves or specific details on the mask. Be cautious not to overheat, as foam can melt or burn.
- Build Layers: Add more foam layers to build up the design. Continue gluing on foam pieces, one layer at a time, to create depth and texture for the mask.
4. Sand the Edges for a Sleek Finish
- Sanding: Once you’ve built the basic shape, use sandpaper or a sander to smooth out the edges and refine the shape. The more time you spend on this step, the cleaner and more professional your final mask will look.
- Sealing with Mod Podge: To give the foam a more durable surface and create a smoother base for the silicone mold, apply a thin layer of Mod Podge over the entire mask. This will seal the foam and provide a surface that the silicone will adhere to better.
5. Prepare the Mold Base
- Place the Mask on a Base: Position the mask on a sturdy base made from foam or a similar material. Build up the area around the mask using foam board to create walls for your mold.
- Attach Mold Walls: Glue the foam board pieces into place, forming a barrier around the mask. Ensure the walls are secure and can contain the silicone when it’s poured.
- Spray Mold Release: Once the mask is set in place, spray the entire surface with a mold release agent to prevent the silicone from sticking to the foam. This will make the demolding process easier later.
6. Make the Silicone Mold
- Mix Two-Part Silicone: Prepare your two-part silicone rubber according to the instructions on the packaging. Mix the components thoroughly to ensure the silicone sets properly.
- Brush the Silicone onto the Mask: Using a brush, apply the silicone to the mask’s surface, making sure to get into all the nooks and crannies. This is the first layer of your mold, so work slowly to ensure full coverage.
- Pour the Remaining Silicone: Once you’ve covered the mask in silicone, pour the remaining silicone into the mold cavity. Carefully work the silicone up to the top edges of the mold, ensuring the entire mask is encased.
- Add Plaster for a Strong Base: After the silicone has set, apply plaster bandages over the top of the silicone to create a hard shell that will protect the mold during the resin pour. This plaster will reinforce the silicone and prevent any warping during the casting process.
7. Resin Pouring
- Mix Epoxy Resin: Prepare your two-part epoxy resin and mix it with black dye to achieve a dark base color for the mask. Stir the mixture thoroughly to ensure even color distribution.
- Use Bronze Powder: Add bronze powder into the mold before pouring the resin. This will act as a mold release and give the final mask a metallic sheen once it’s finished.
- Pour Resin into the Mold: Pour the mixed resin into the mold, making sure to coat the entire mold. You may need to rotate the mold slightly to get the resin into every corner. Add multiple layers of resin, allowing each layer to set before adding the next, until you achieve the desired thickness for the mask.
8. Finishing the Mask
- Demold the Resin Mask: Once the resin has fully cured, carefully remove the mask from the mold. The silicone mold should release easily thanks to the mold release spray.
- Buff the Surface: Use metal wool or a fine polishing pad to buff the surface of the resin mask. This will bring out the shine of the bronze powder and give the mask a smooth, metallic finish.
9. Final Touches
Once the mask is polished and looking shiny, you can add any additional details, such as straps or decorations. The mask is now ready to be worn, displayed, or used as part of a costume or prop!
Conclusion
Creating an epoxy resin casting mask from start to finish is a rewarding process that allows you to craft a high-quality, custom design. With patience and attention to detail, you can build a durable, sleek, and professional-looking mask. From sculpting the base structure with foam and clay to pouring the final resin layers, each step contributes to making a unique and beautiful piece. Whether for cosplay, artistic projects, or special effects, this method will help you create a stunning epoxy resin mask that stands out.

